
Hey, adventurer! I’ve always been mesmerized by the moon whenever I see it in the sky. It was actually one of the first things I learned to draw when I started using Adobe Illustrator.
For the next couple of days, the moon will be in its Waxing Crescent phase. My color palette for this phase isn’t the traditional moon colors, but feel free to use whatever colors you like. After all, this is all about getting creative!
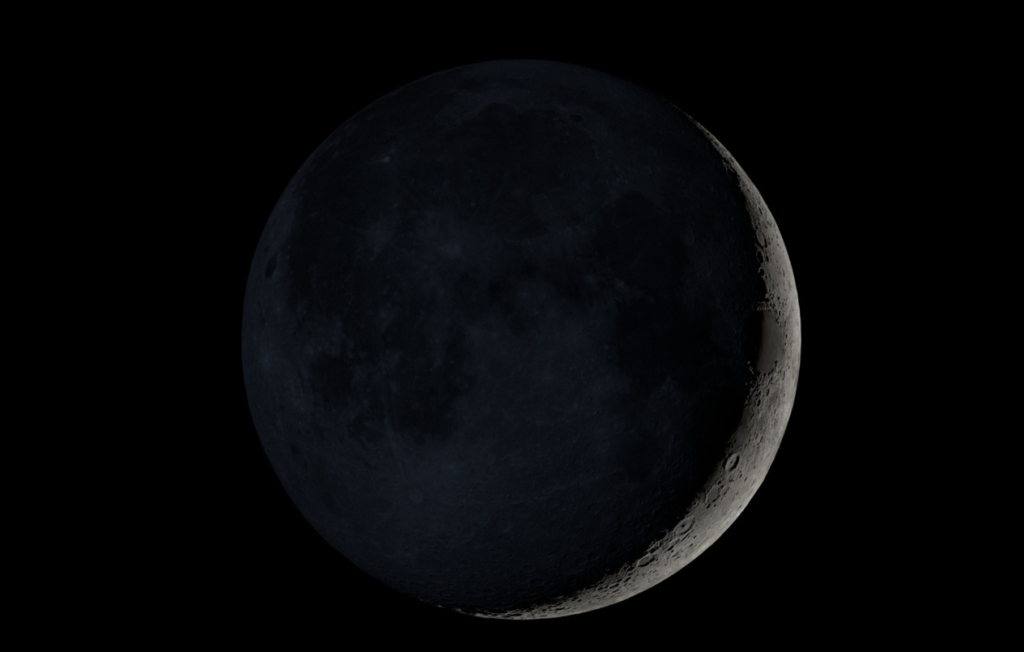
The final moon
Our moon will look something like this once we are done =)
The color palette
I wanted to create something fun and unique for my moon this week. I chose blue, green, and brown as my colors, but dividing the frame into seven equal sections was more challenging than I expected. Geometry has never been my favorite!
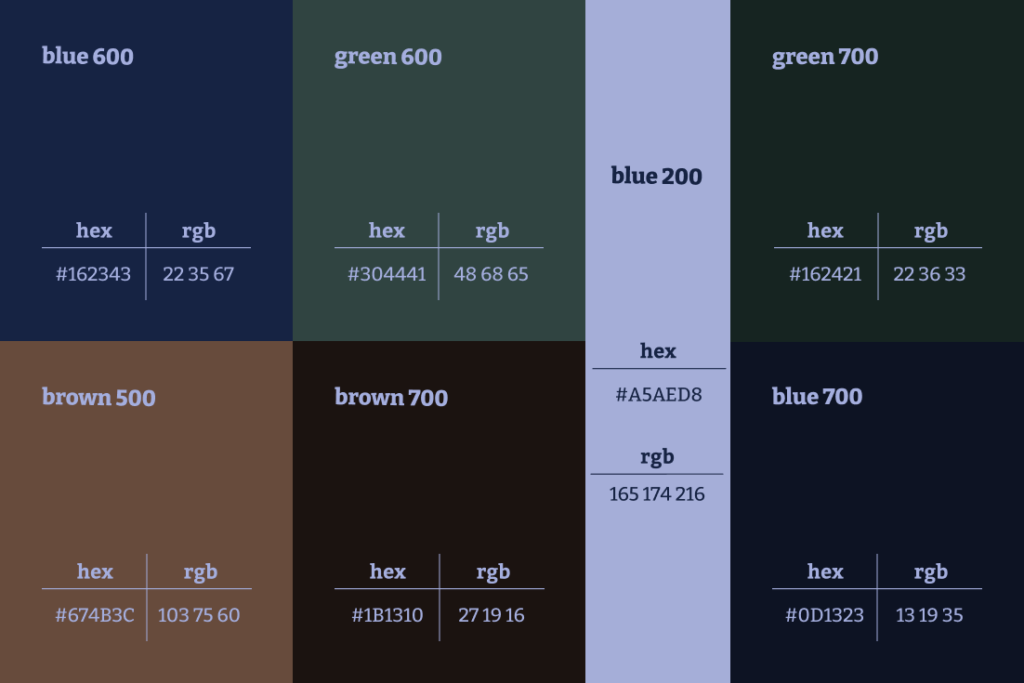
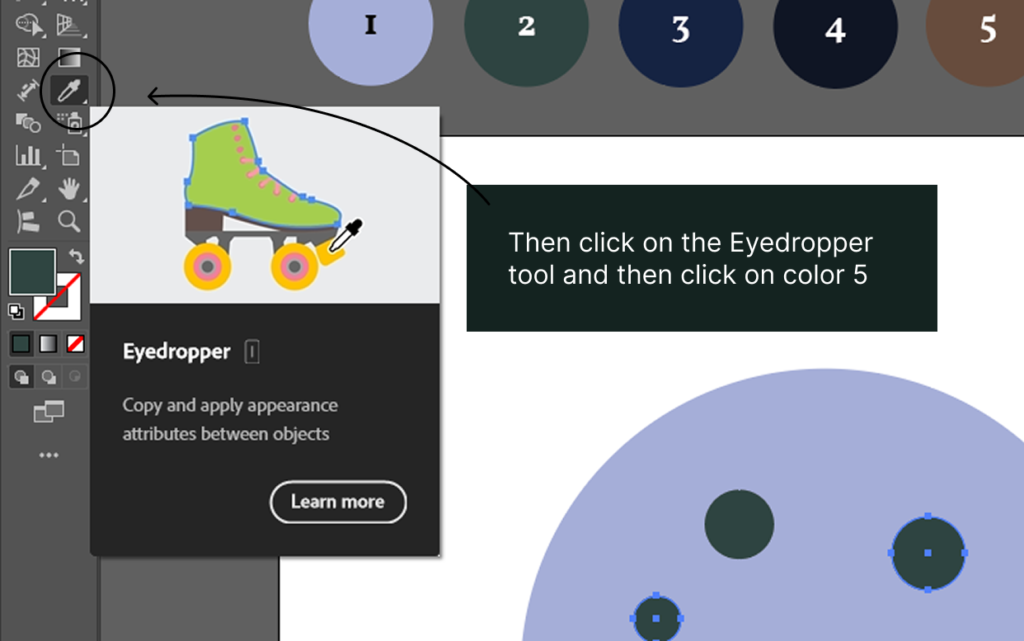
In the post I numbered the colors for the ease of use.

- #A5AED8
- #304441
- #162343
- #0D1323
- #674B3C
- #1B1310
- #162421
Full moon
Let’s start by creating the full moon. Since I’d like to reuse this moon in my illustrations, it will serve as the base for my design.
Create a new document to begin. You can choose any frame dimensions you like, but I decided to start with 1080×1080 pixels, the size of an Instagram post.
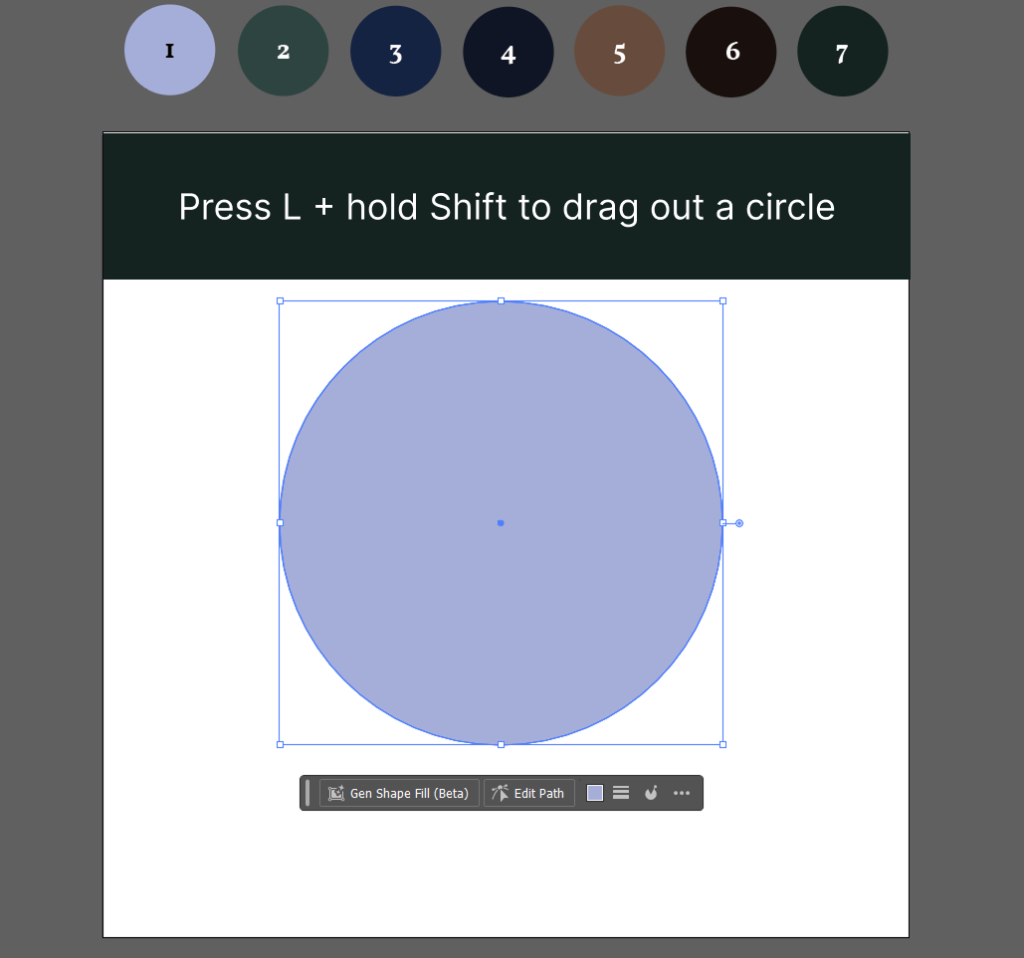
Press L and hold Shift key to drag out a circle.
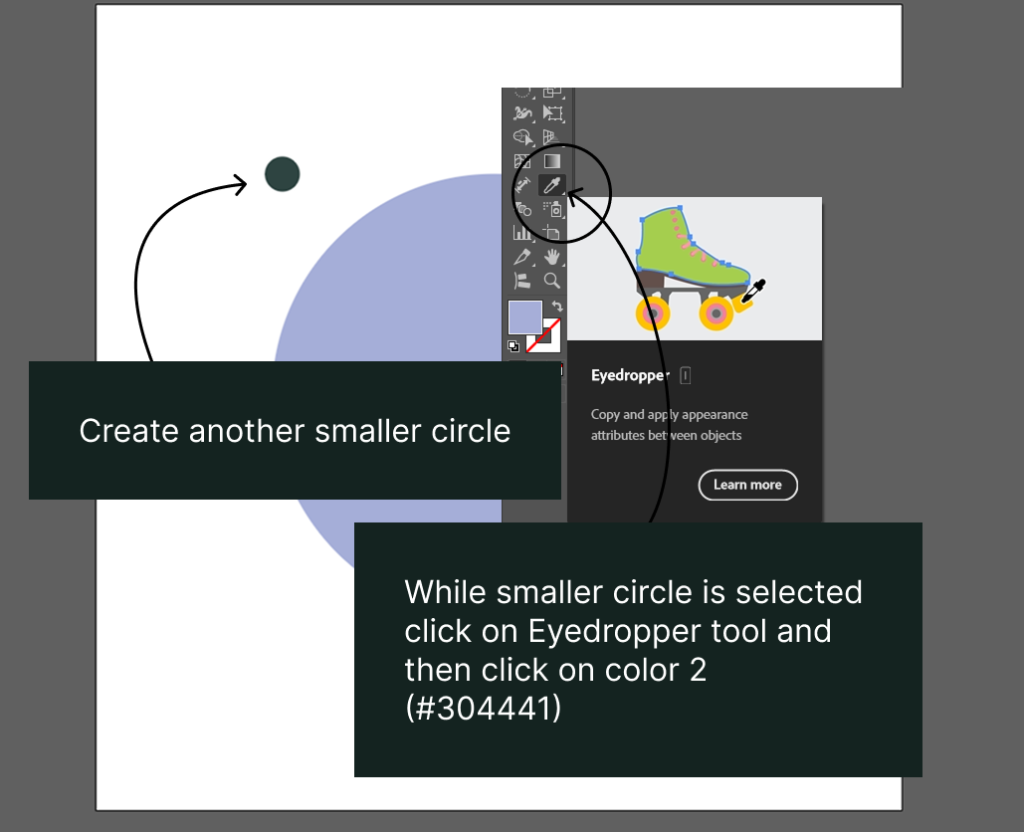
Next create another smaller circle and change it’s color to #304441. This circle is a crater.
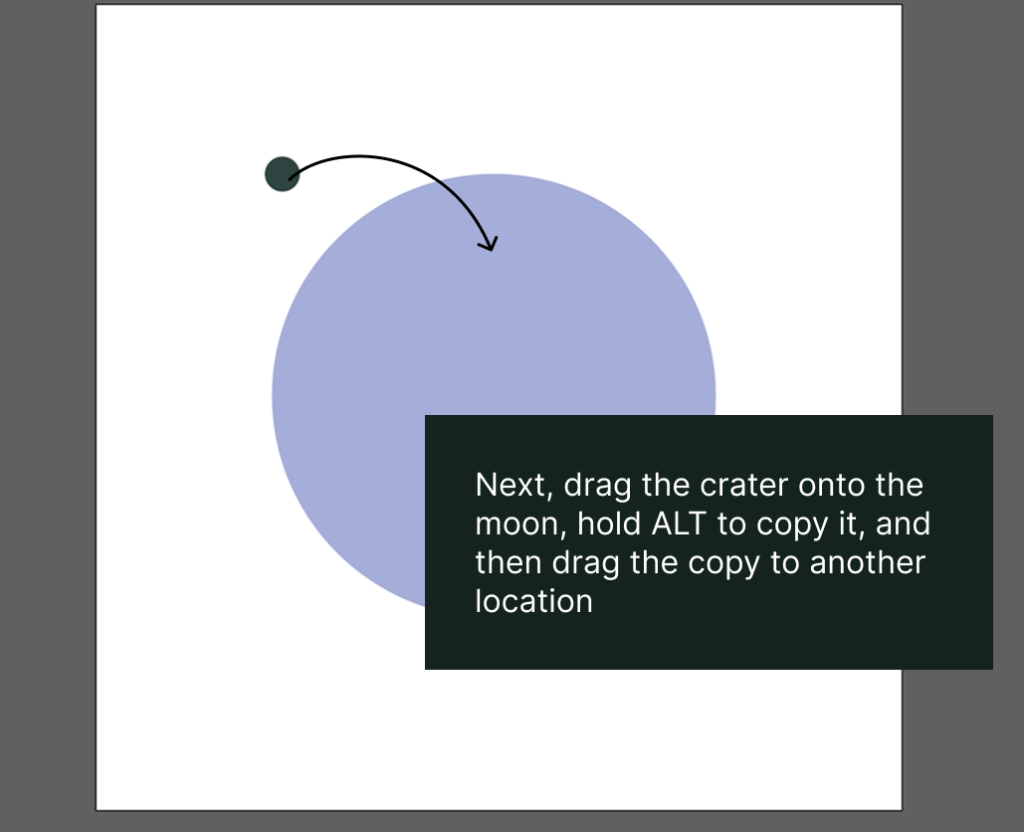
Drag the crater over on top of the moon.
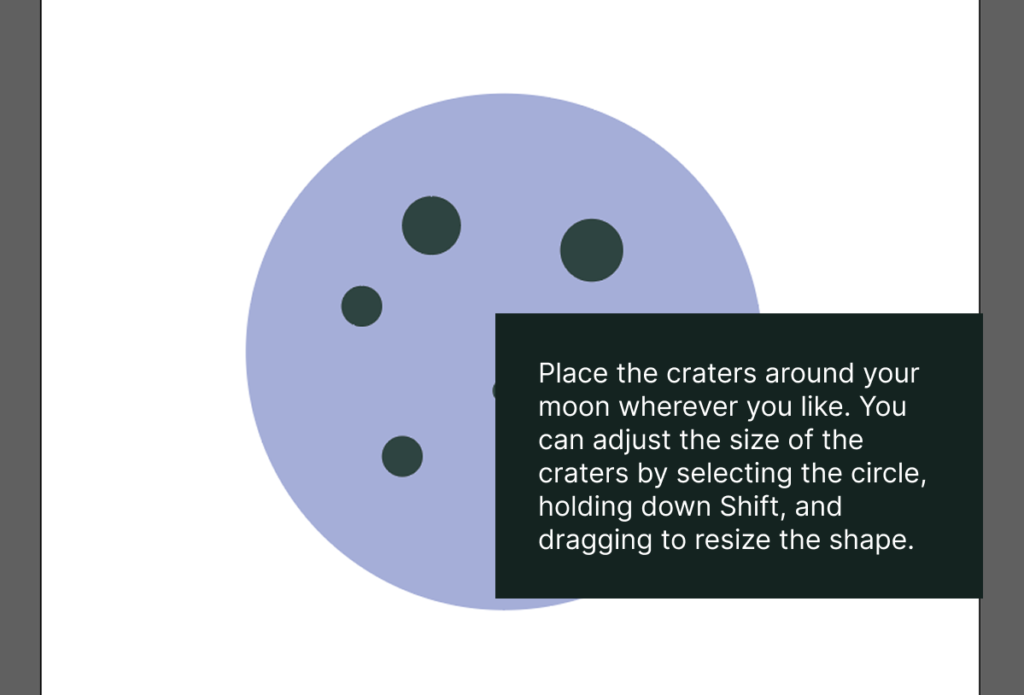
Copy and paste the crater and change sizes for the duplicates.
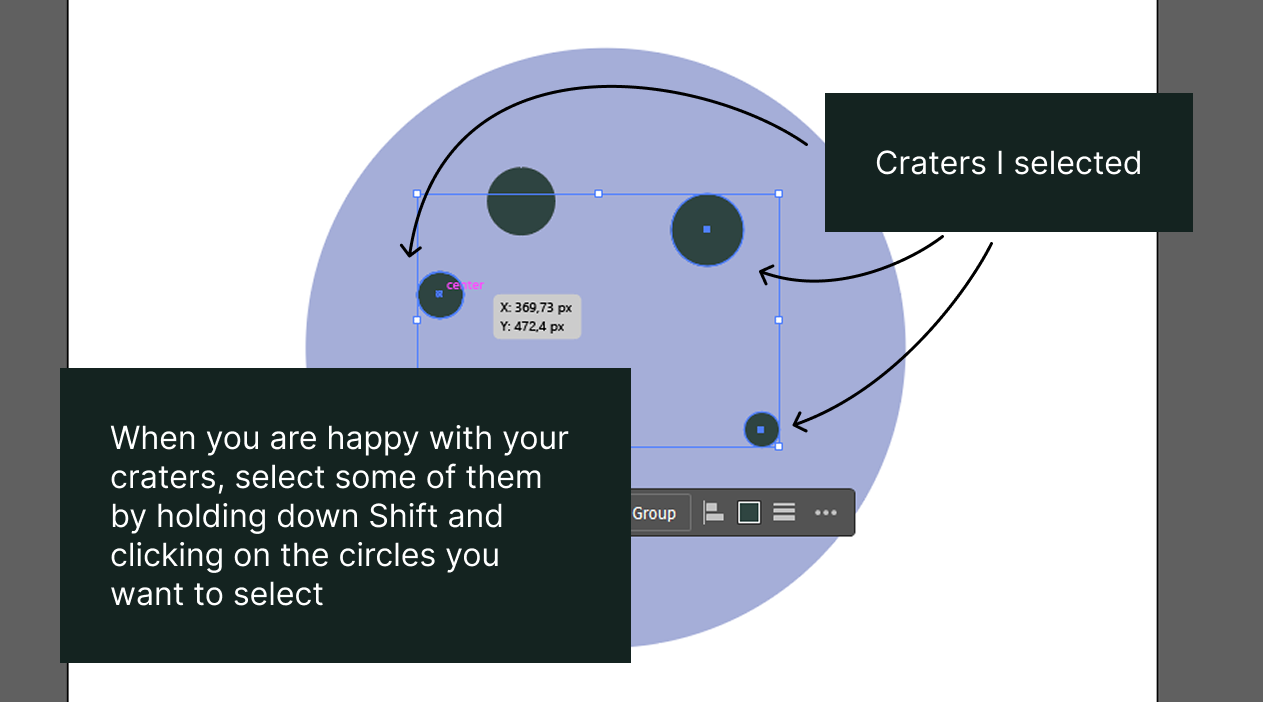
Next, we change colors of the selected craters.
Change the color to #674B3C.

As we see, the colors of this moon are not exactly standard =)
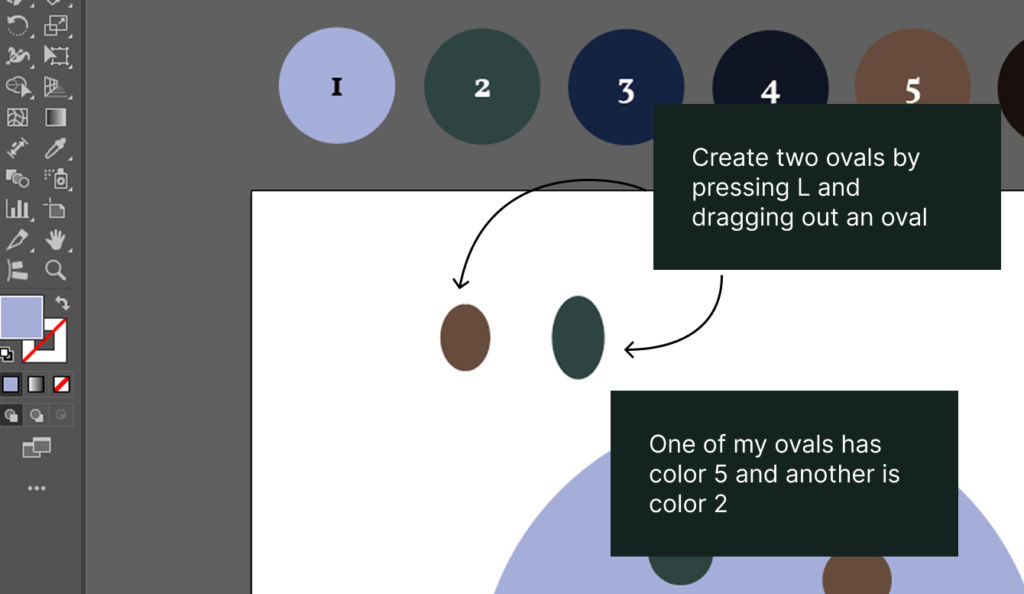
Let’s create two ovals: one in color #304441 and the other in color #674B3C. These ovals are going to add volume and depth to our moon.
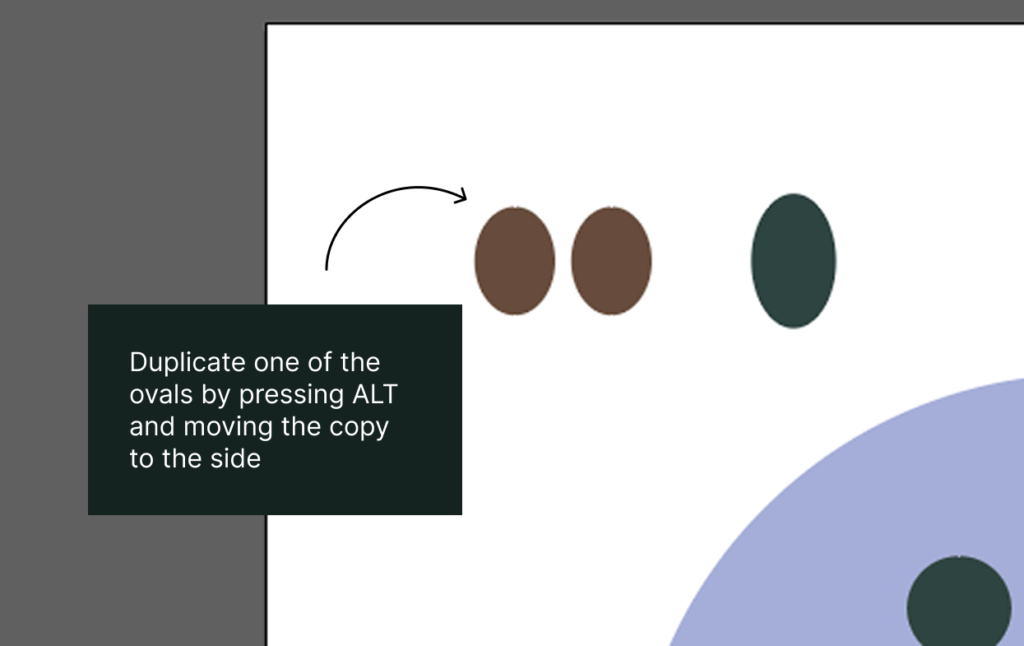
Duplicate one of the ovals.
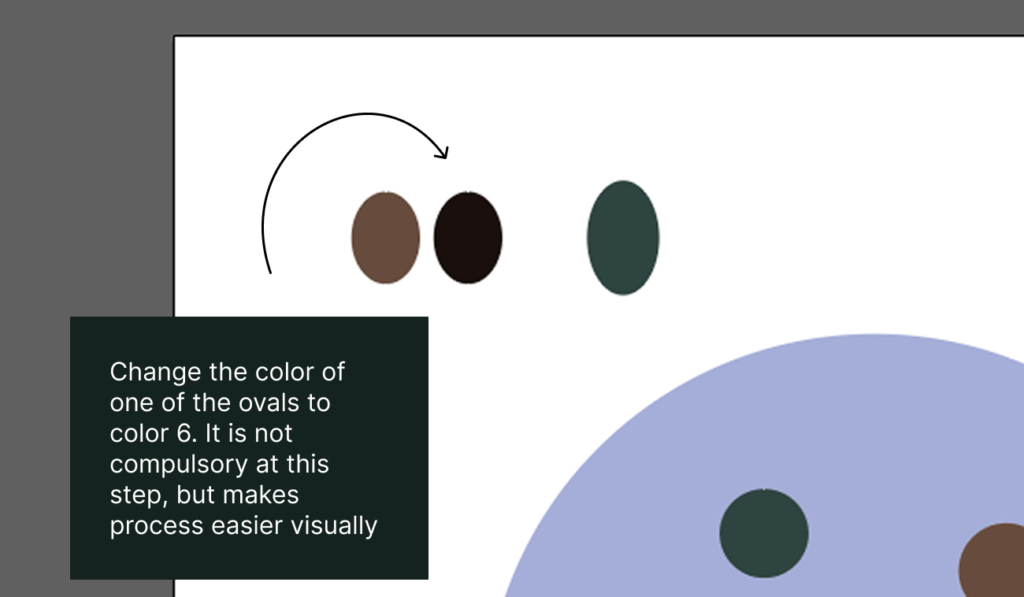
Change the color of one of the ovals to #1B1310.
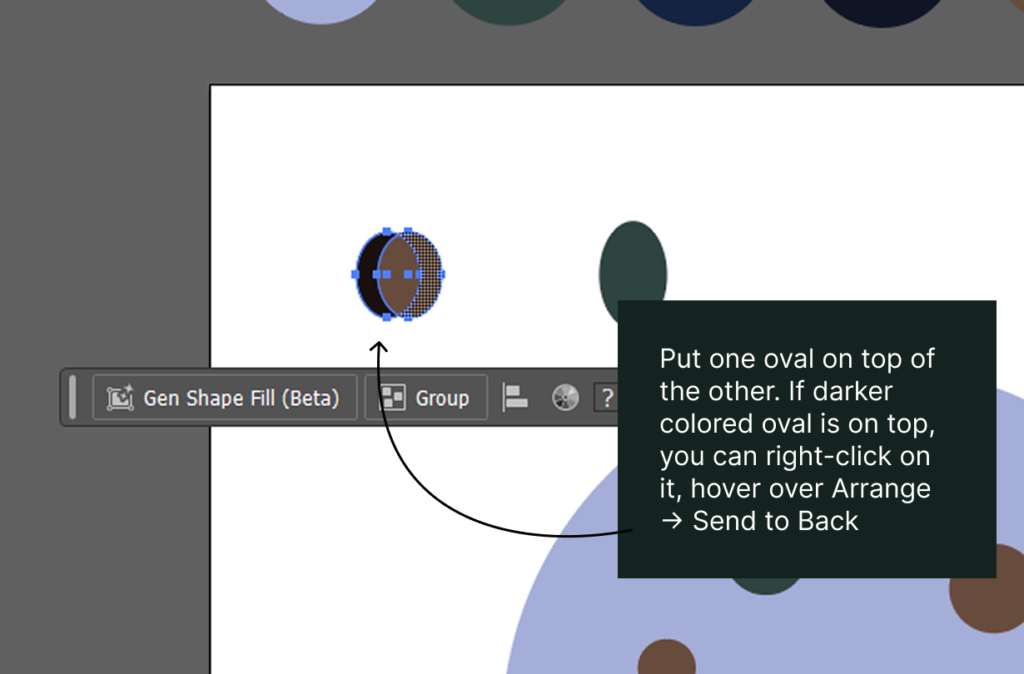
Put one oval on top of the other.
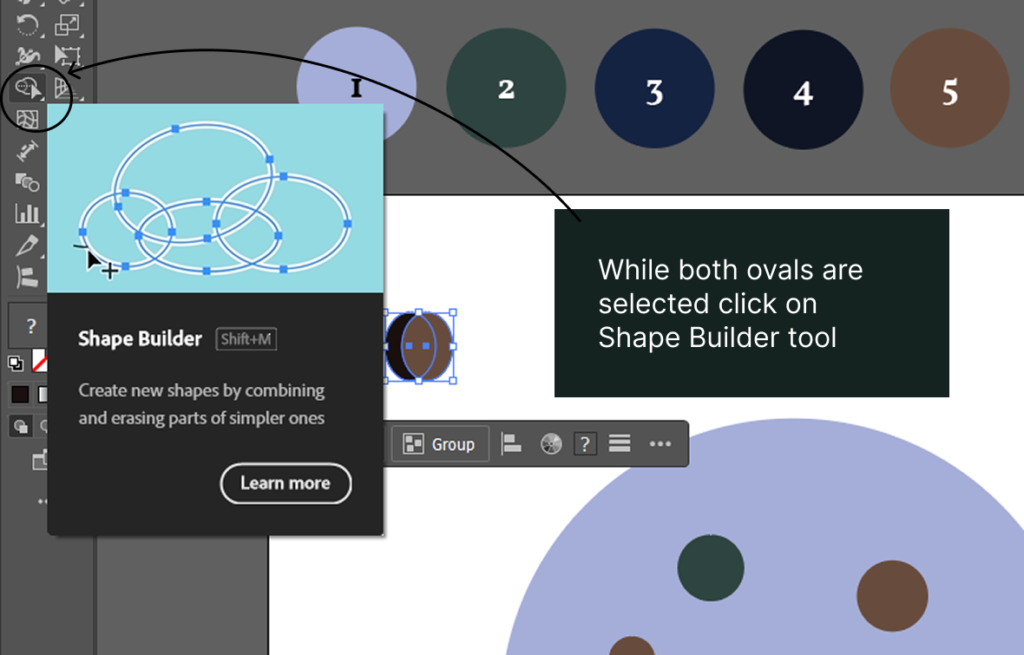
Shape Builder tool is one of the best tools in Adobe Illustrator.
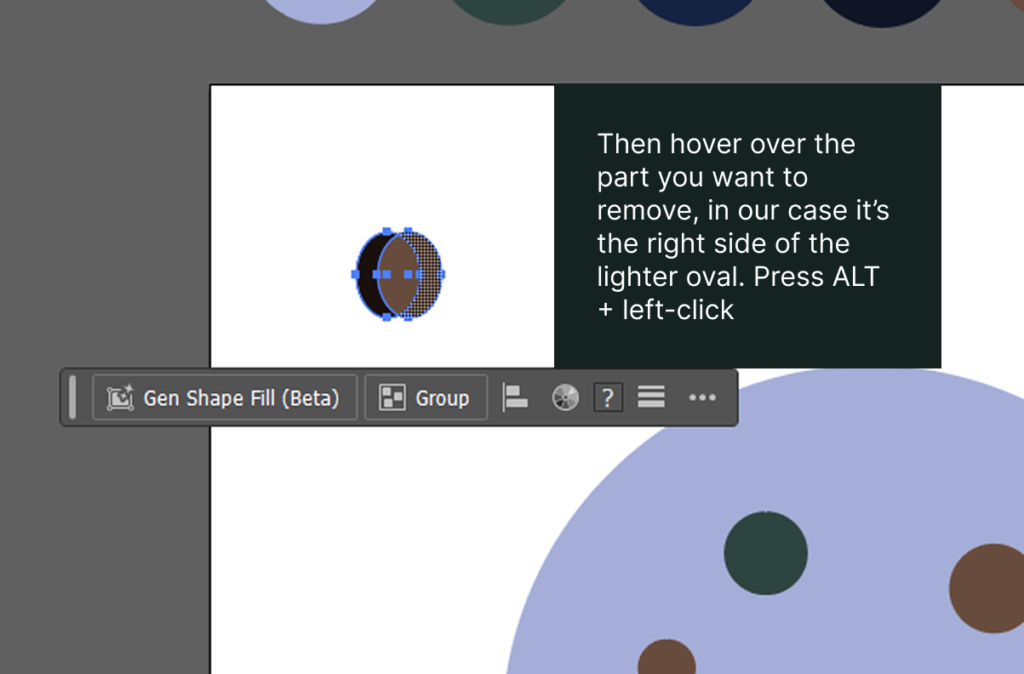
With the Shape Builder tool selected, hover over the part you want to remove, in this case, the right side of the lighter oval. To delete it, hold ALT and left-click.
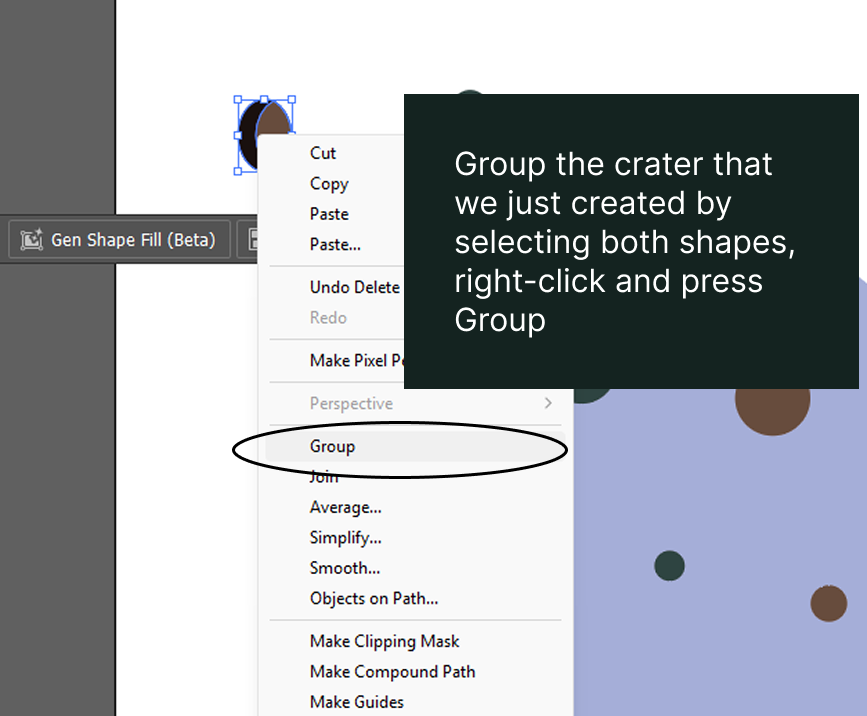
Let’s group the new crater.
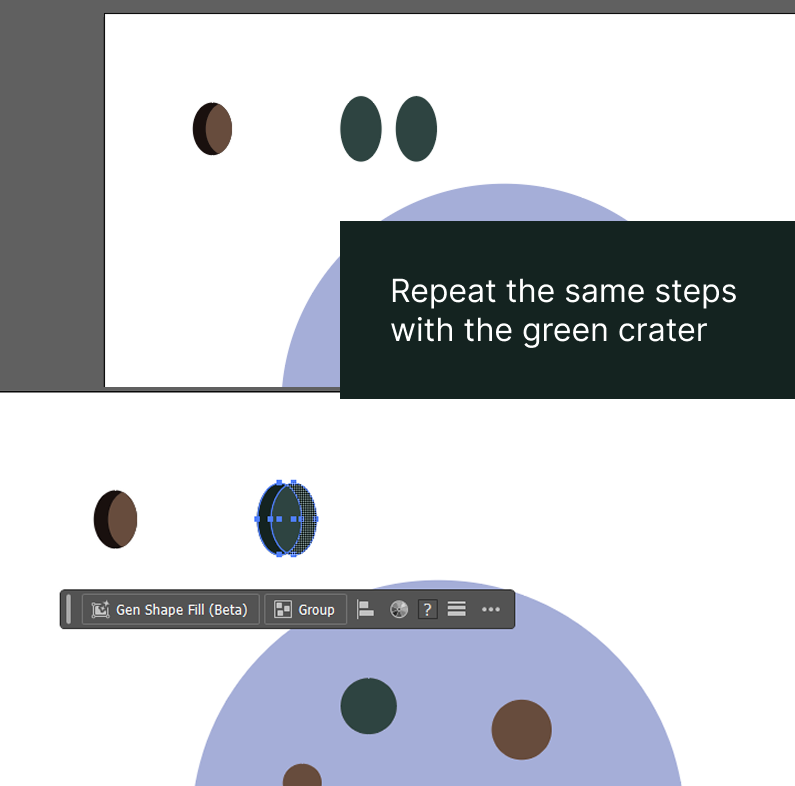
Darker shade of green for the second oval is #162421.
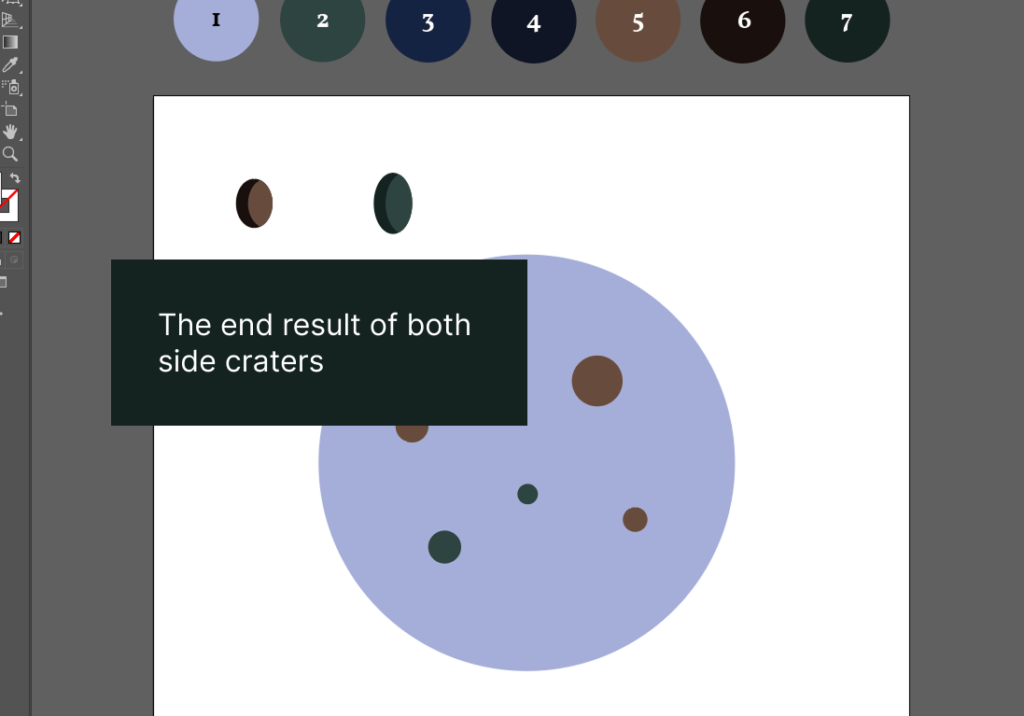
The side craters are done!
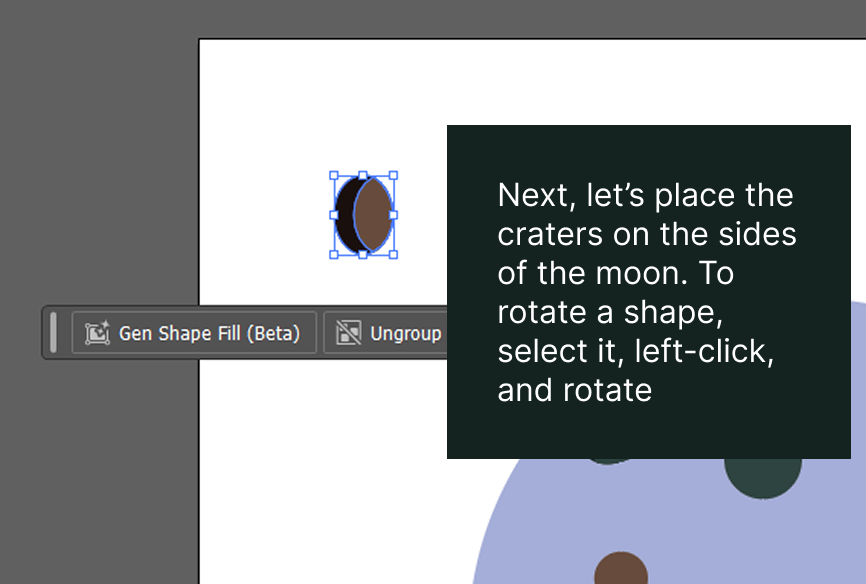
Let’s rotate the crater.
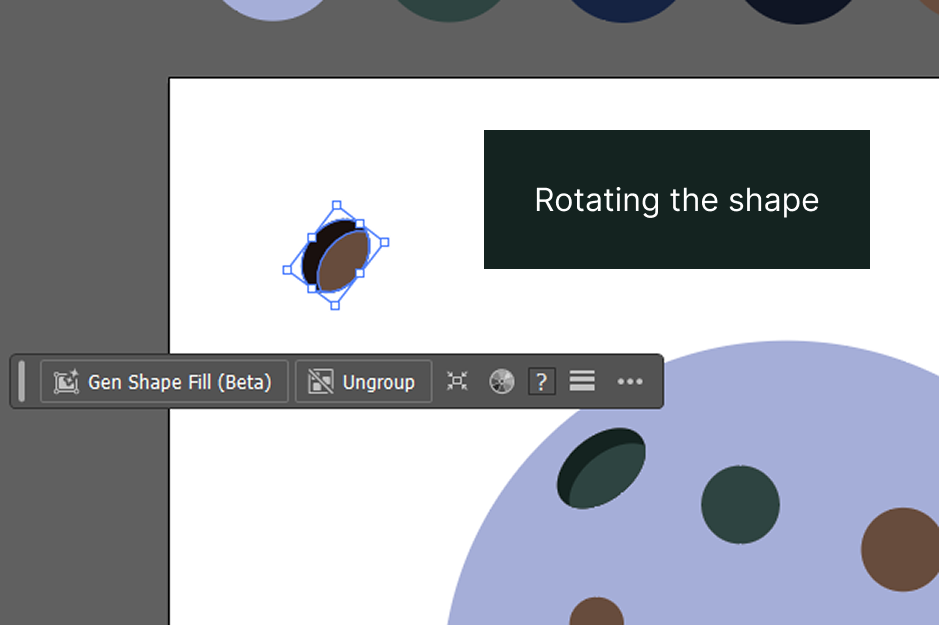
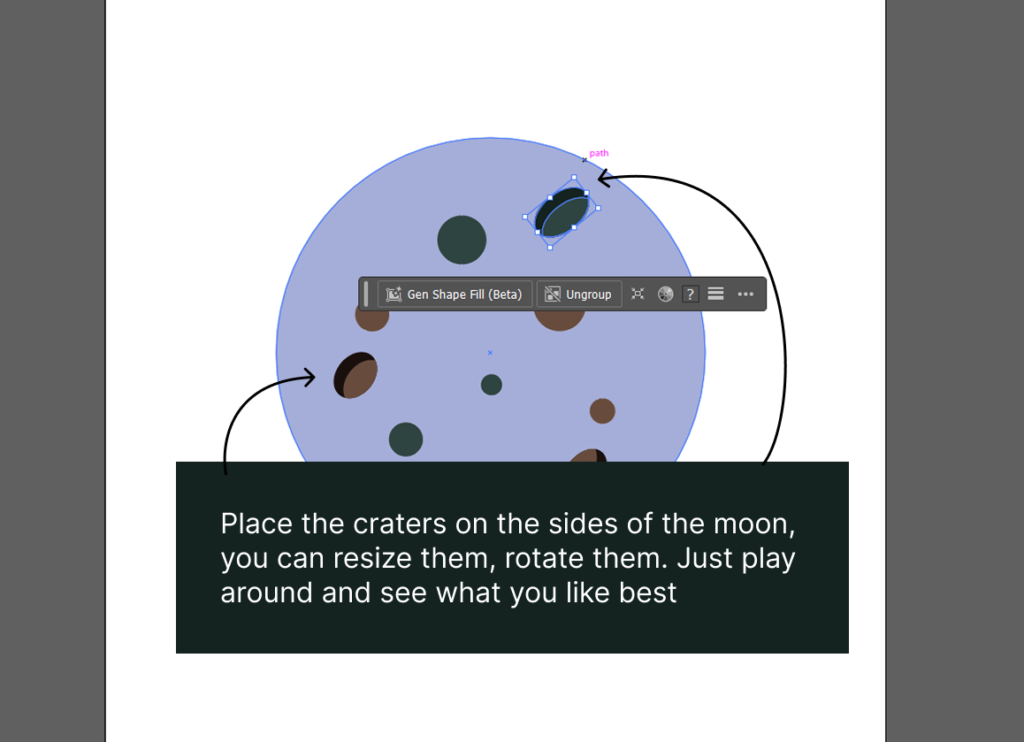
Play around with crater position and see what you like.
A little extra
If you want to add more depth and volume to your moon, you can repeat the same steps used for the side craters on a few of the circular craters.
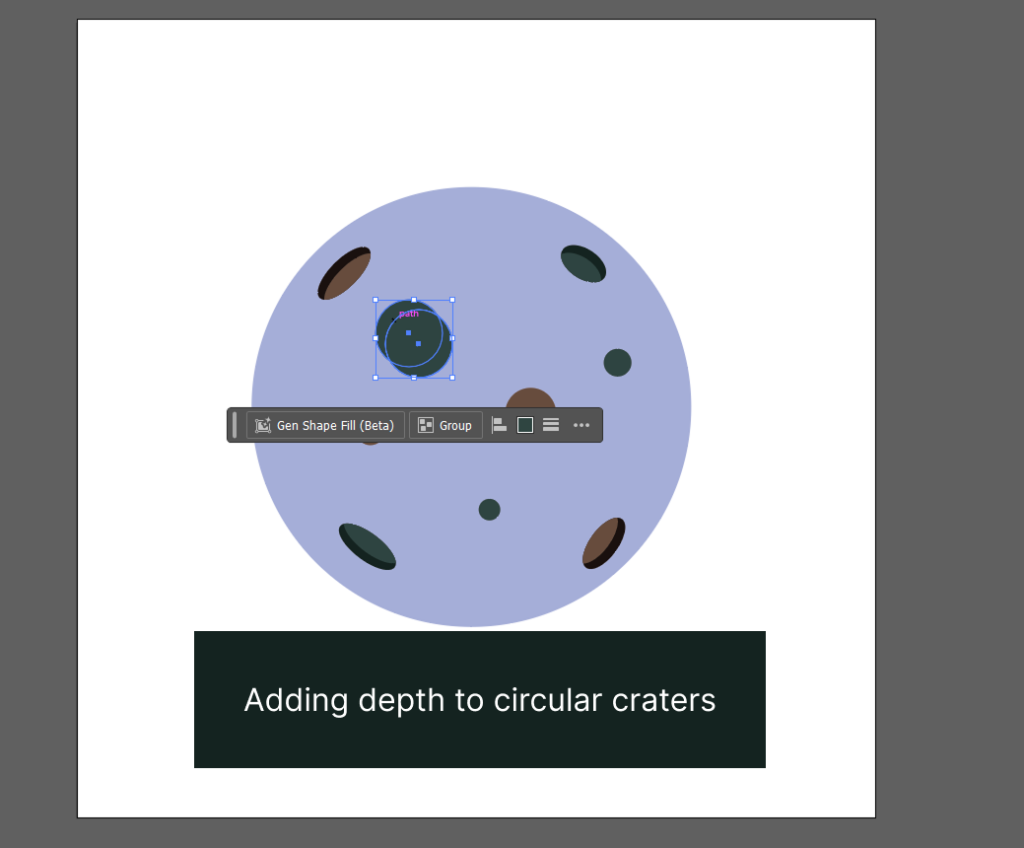
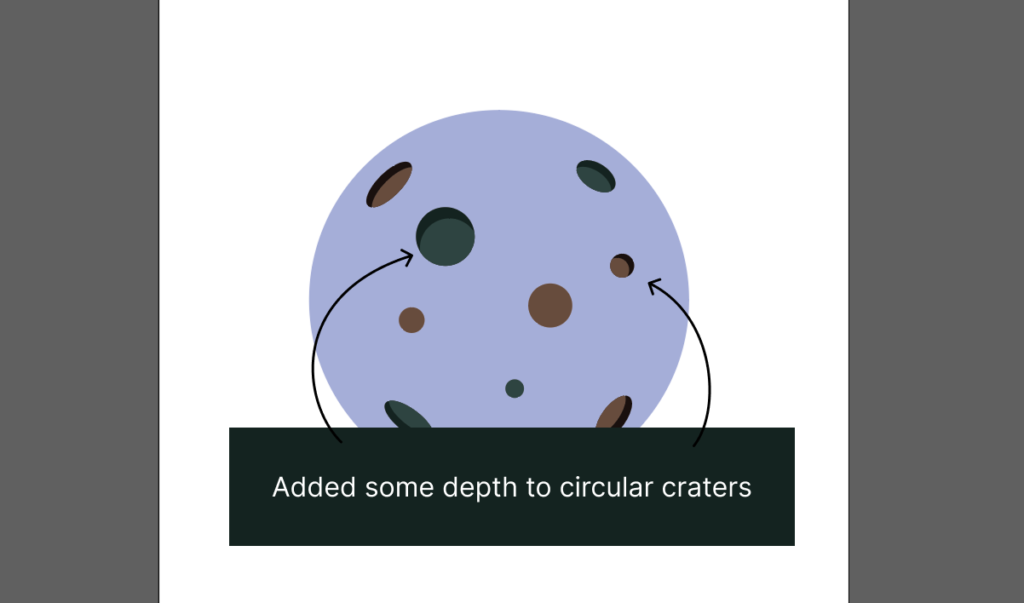
I updated two circular craters.
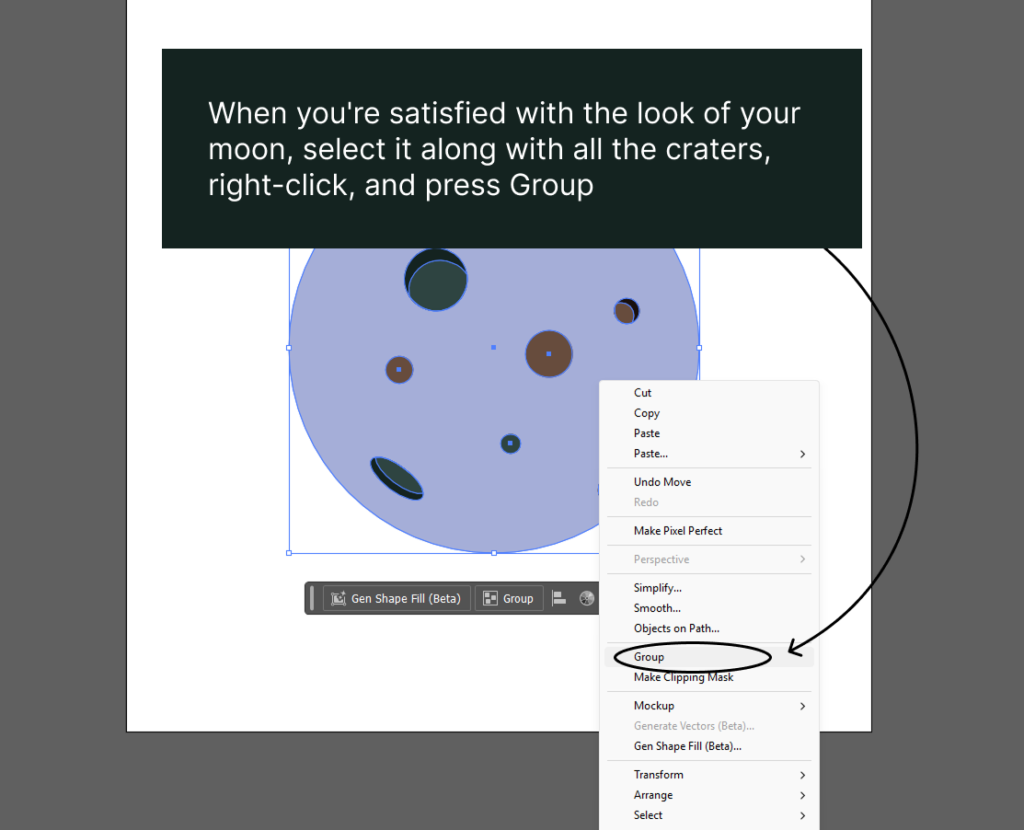
Let’s group the moon with craters.
Waxing Crescent
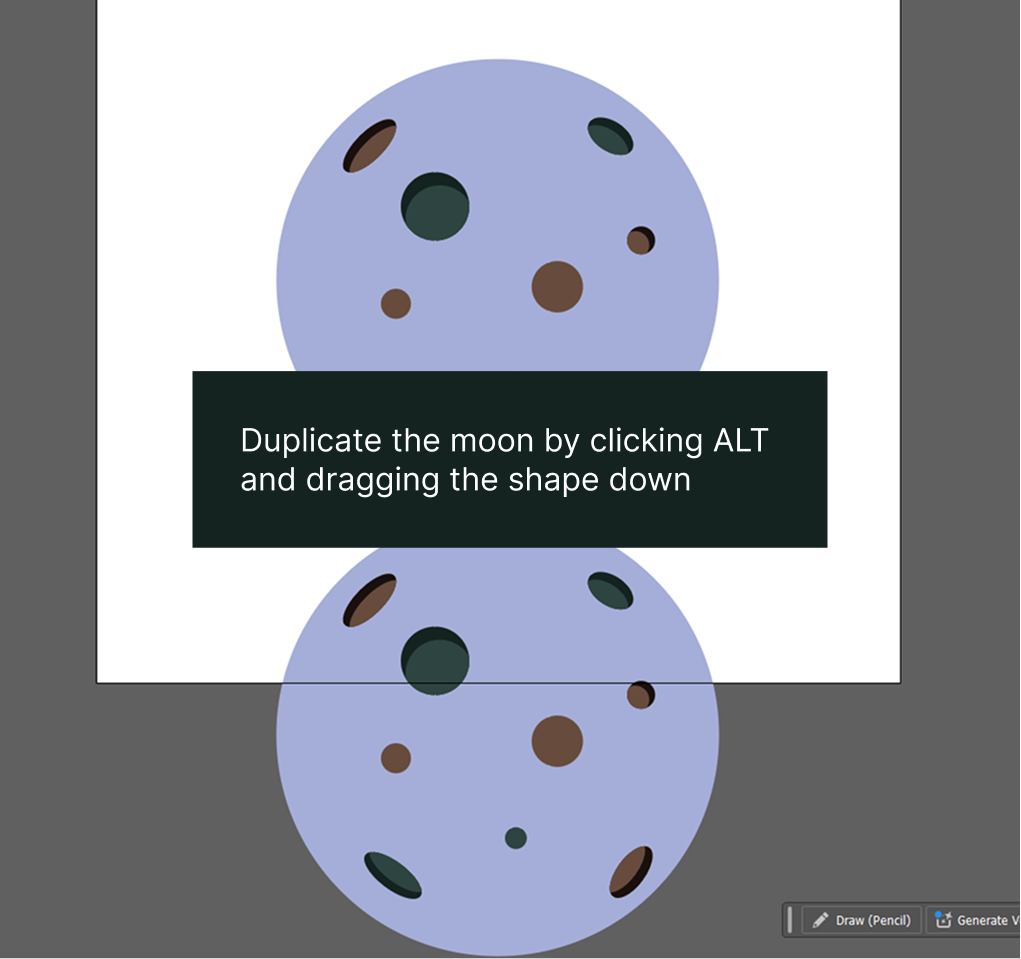
Duplicate the moon and change the color of the copied moon to #304441.
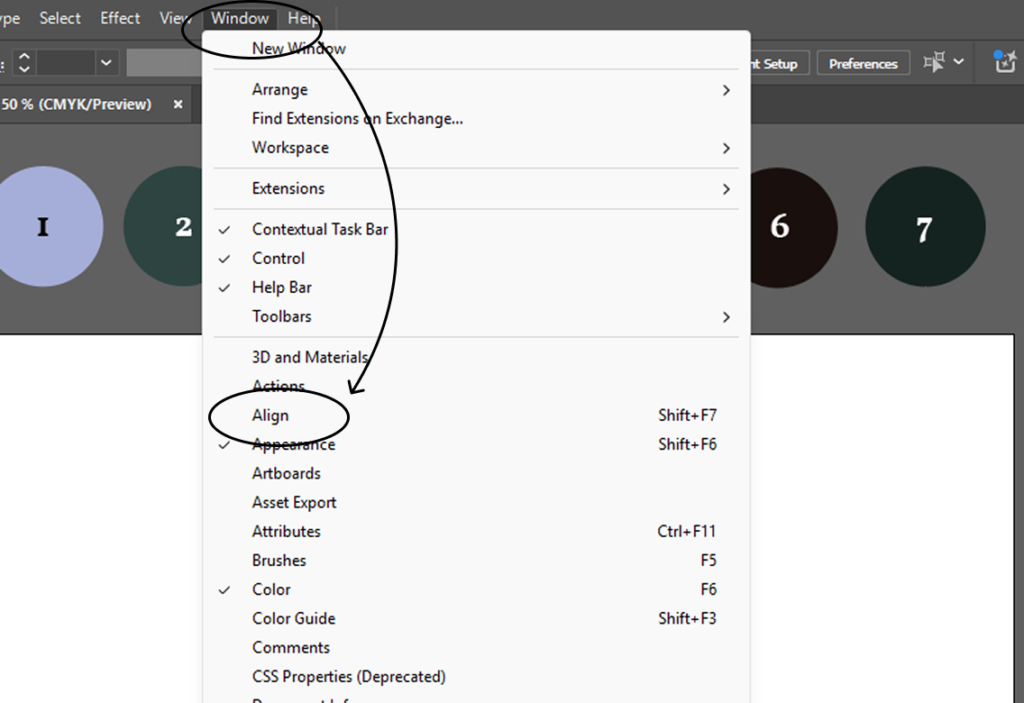
You can find Align tool by going to Window -> Align
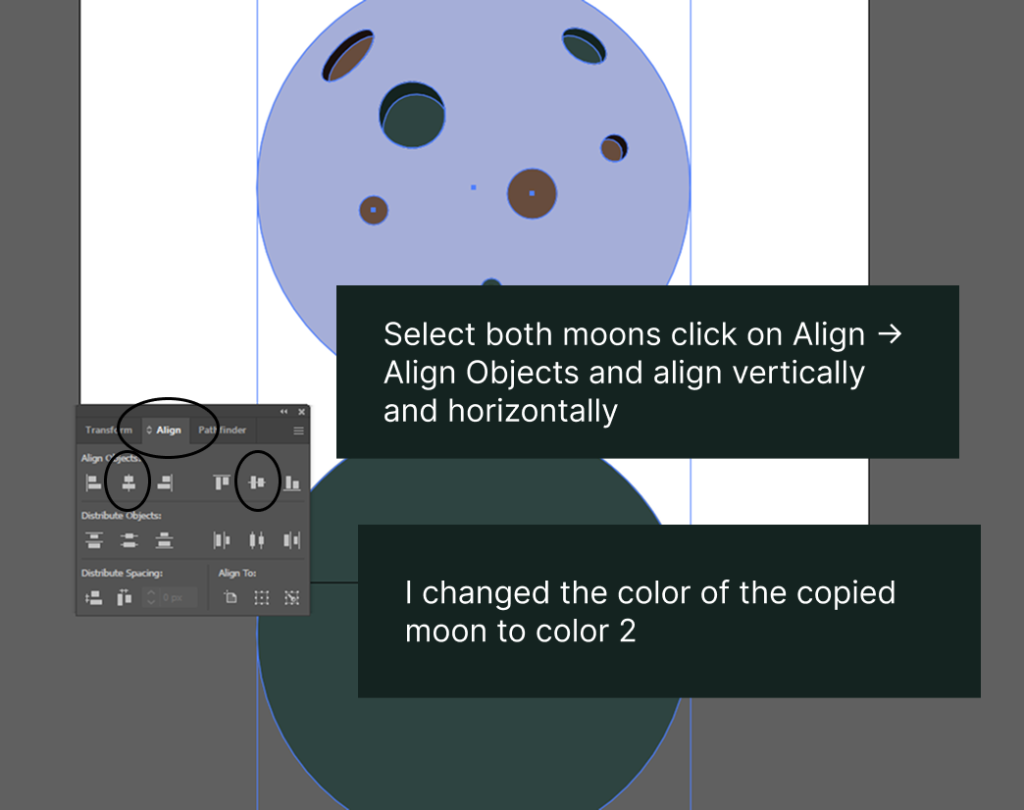
Next, on the panel that appeared, click on Align and choose both align vertically and align horizontally.
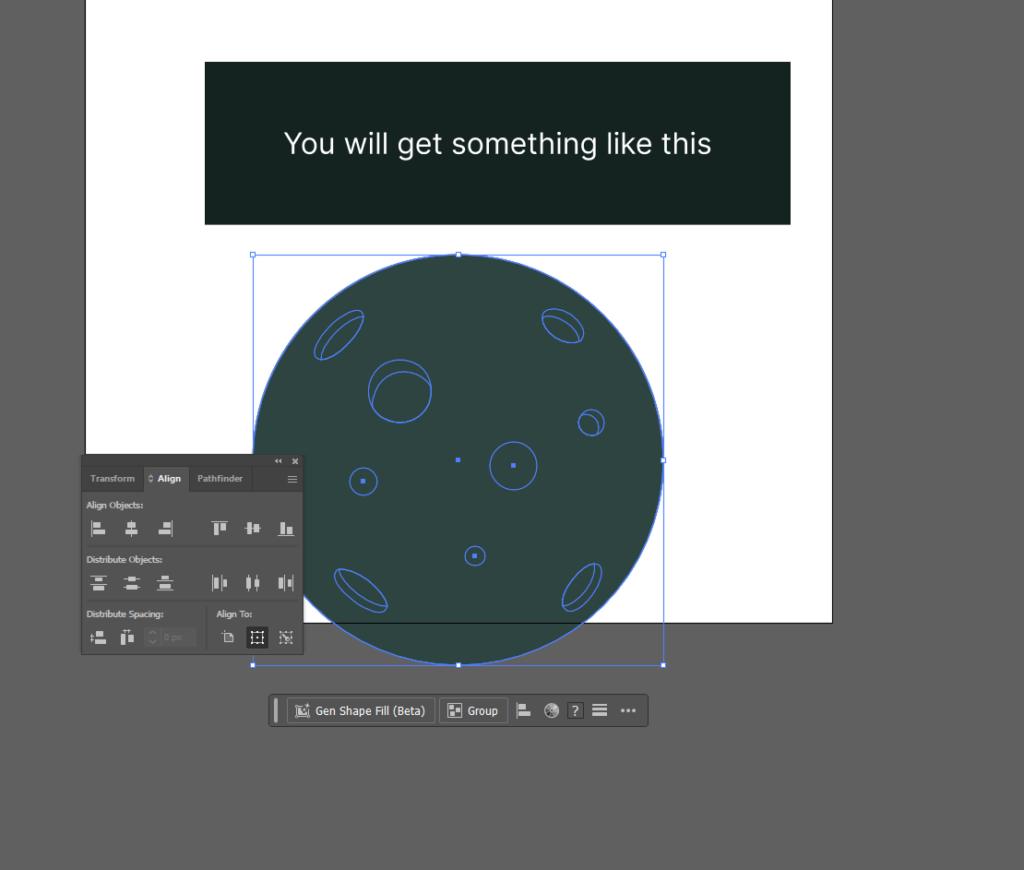
You can move the moons up onto the frame.
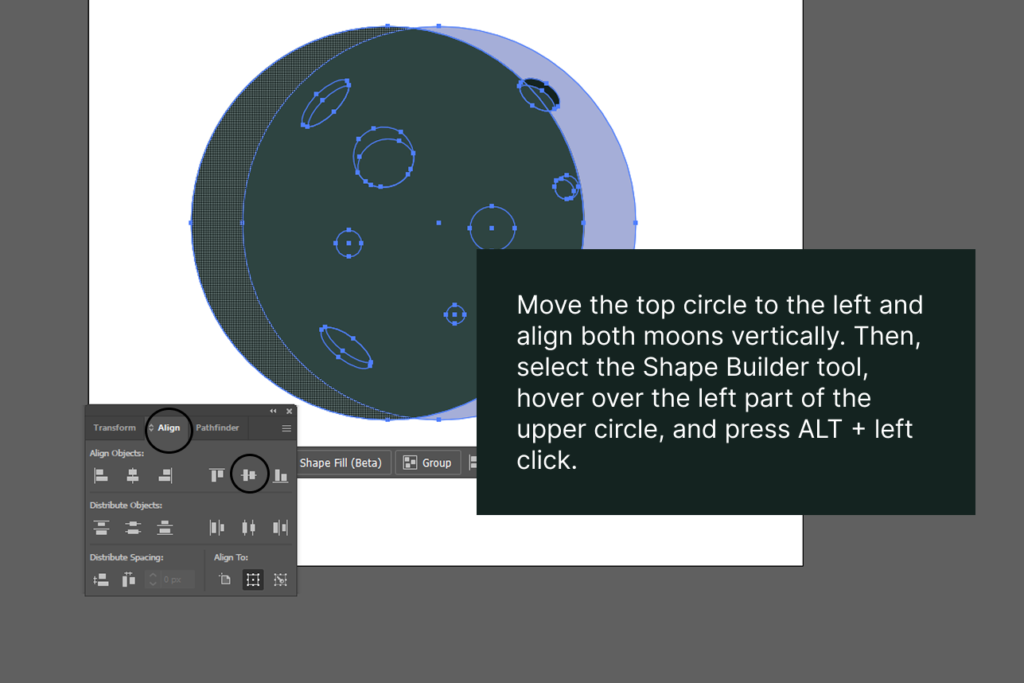
Align them vertically.
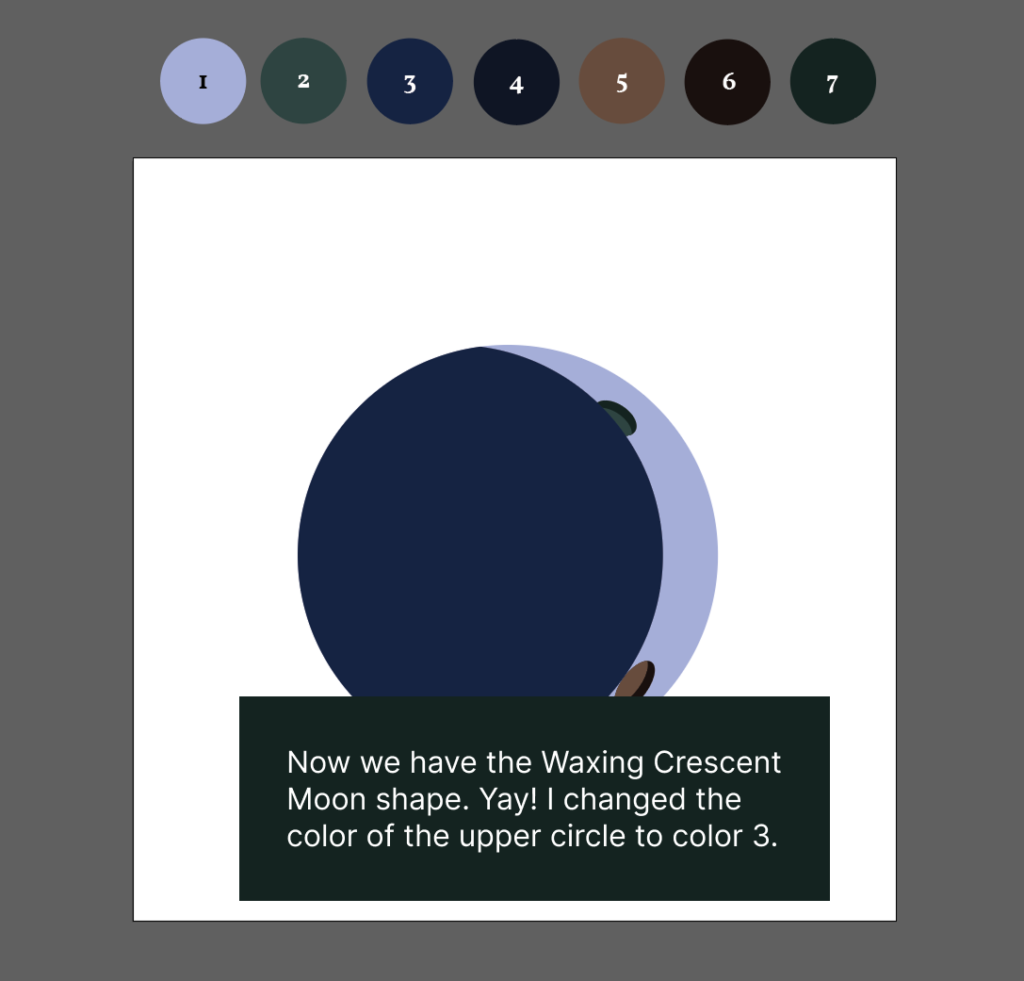
The color of the upper circle (our shadow) was changed to #162343.
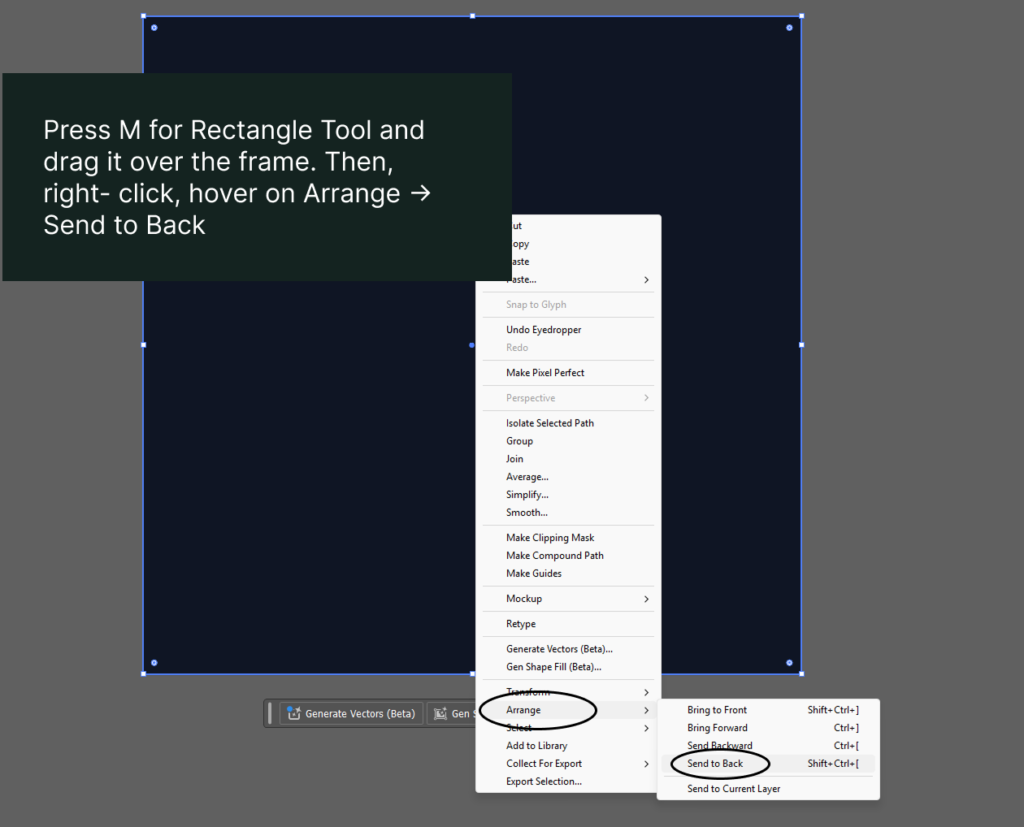
Adding background
Background’s color is #0D1323.
Adding extra flair
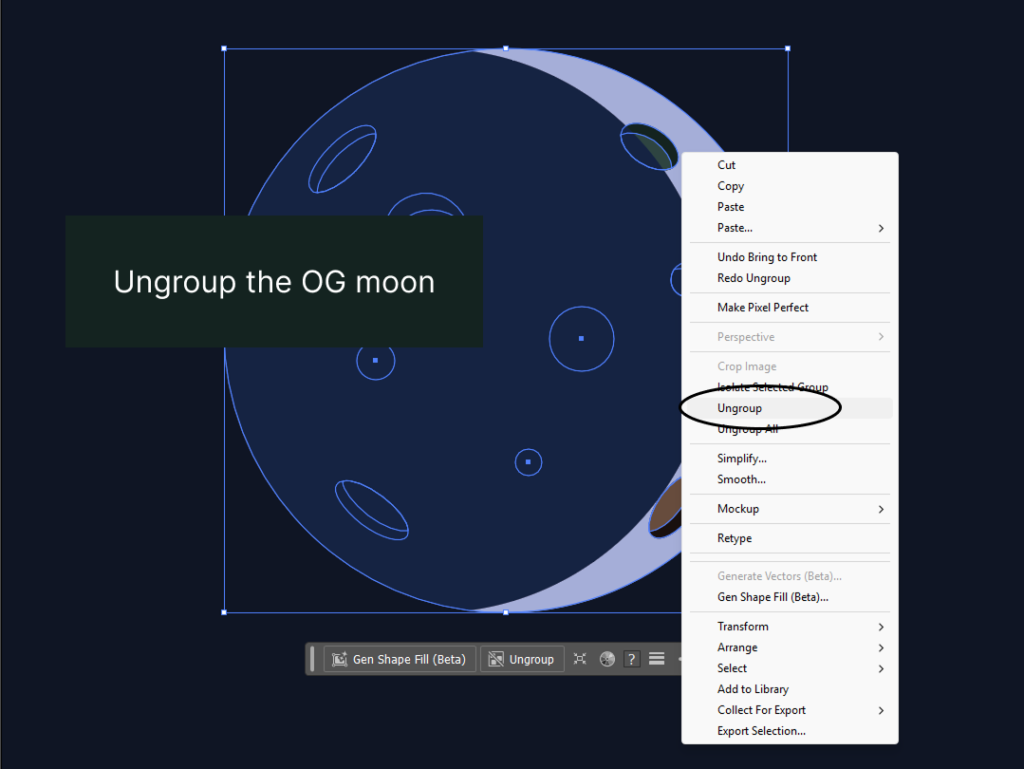
Let’s ungroup the original moon by selecting it, right-clicking, and clicking on Ungroup.
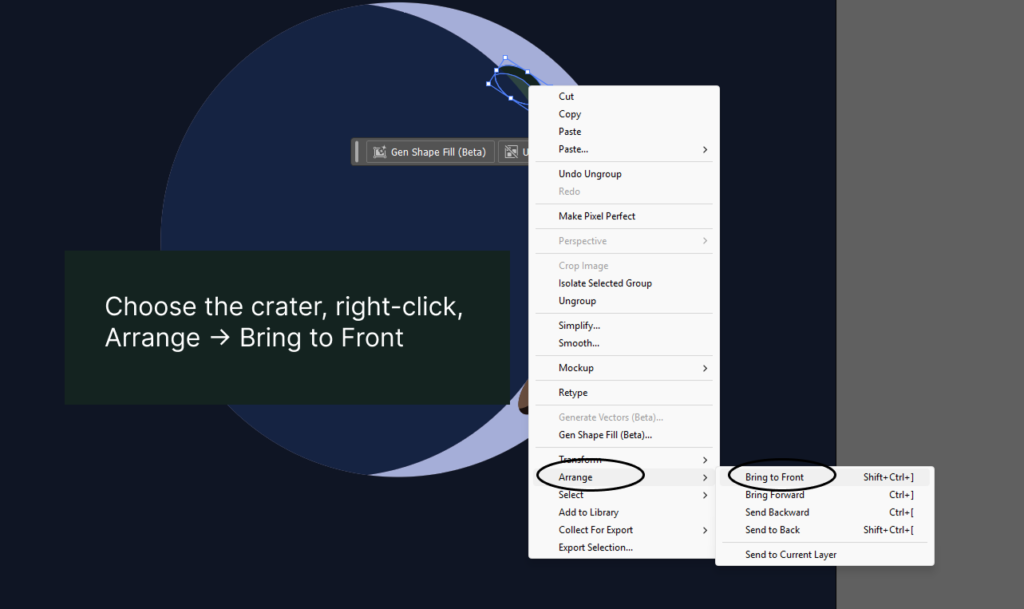
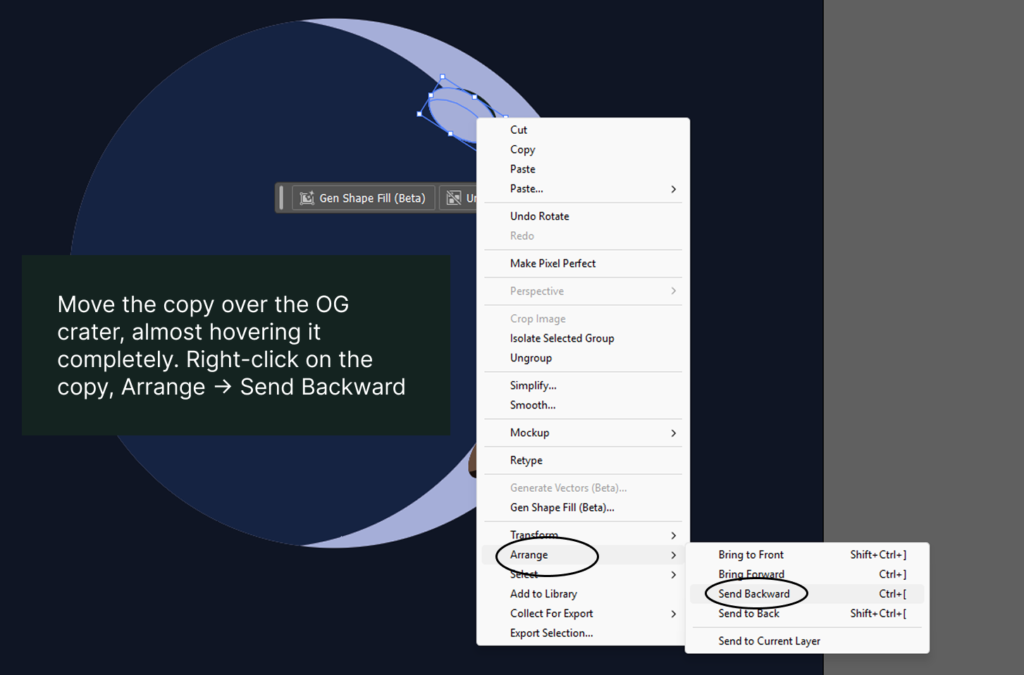
In my moon, there’s a side crater that sticks out from the shadow. To add some extra flair, I’ll place it on top of the shadow.
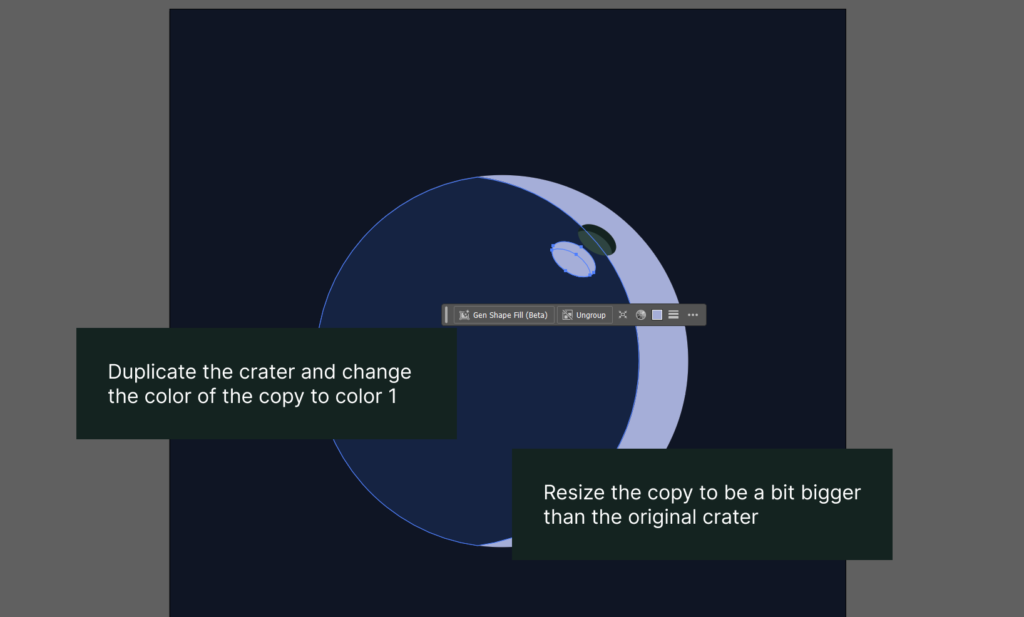
Duplicate the crater and change the color of the copy to #A5AED8.
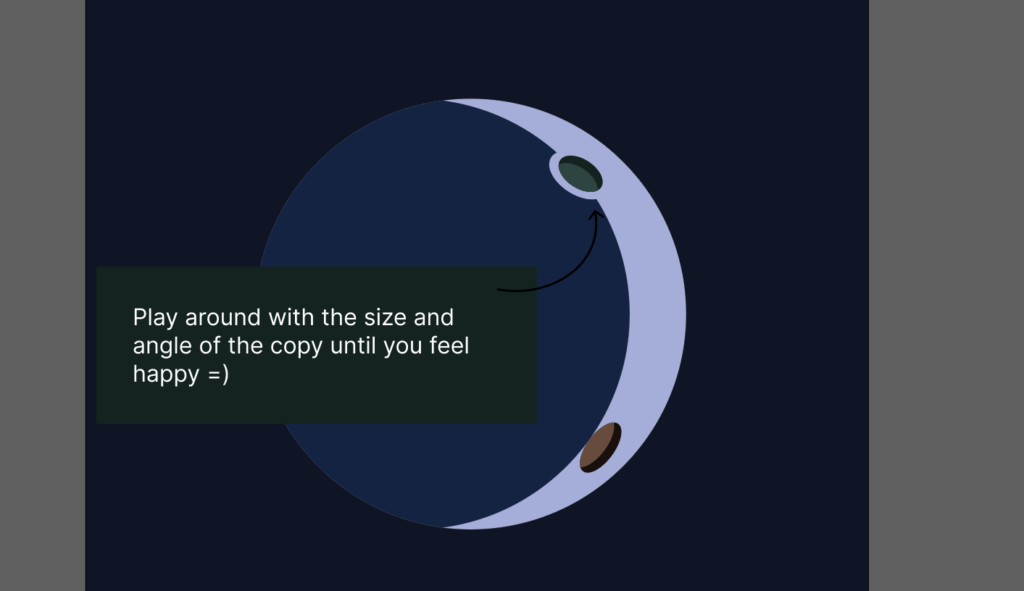
We are done! I hope you are inspired for your next project! =)