
Hey adventurer! I’ve been building my blogs on both Squarespace and WordPress. While WordPress has been my default for years, I wanted to try out Squarespace to learn more about it and gain experience. In this post, we dive into claiming a website on Pinterest on both platforms.
Do you need a Pinterest business account
First, you don’t need to set up a Pinterest business account to claim your website. A lot of posts and videos suggest that converting to a business account is required, but that’s not the case. Having a business account, however, gives you access to your Pinterest account’s analytics, where you can track your pin performance, check your account’s growth, and get free information about your account.
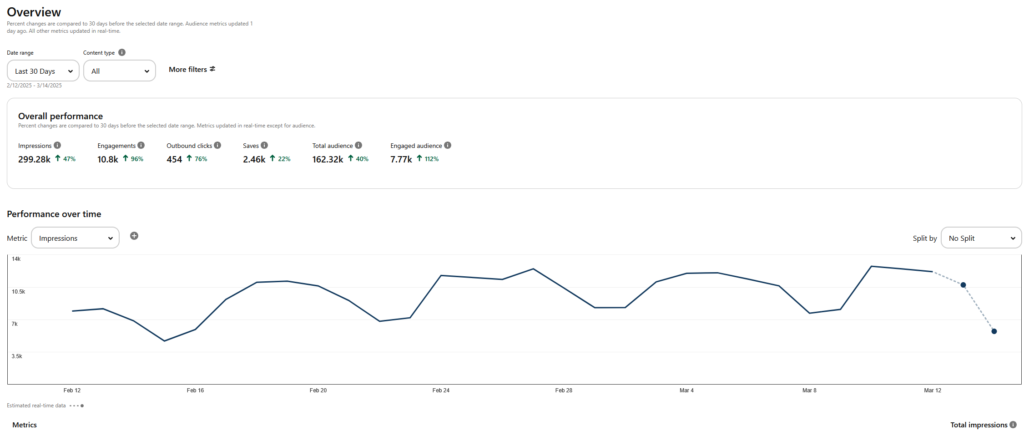
Table of contents
- Getting started
- Ways to claim a website on Pinterest
- Start with Pinterest
- Squarespace
- WordPress
- Verify
Why you should claim your website on Pinterest

Claiming your website on Pinterest links your profile to any content shared from your site. When someone pins your content, your profile picture appears, the pin links back to your Pinterest profile, and a follow button is included for viewers. All in all, there is no reason not to do it.
Ways to claim a website on Pinterest
To claim a website, you need to be able to edit its source code and own the domain or subdomain.
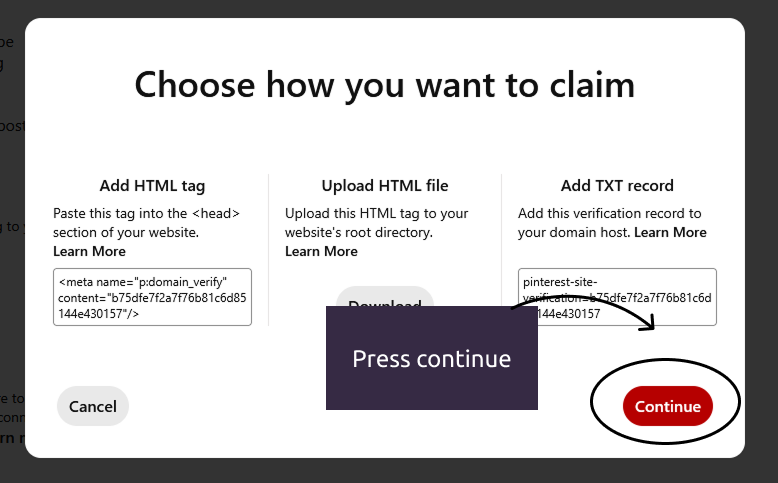
There are 3 ways to claim a website on Pinterest: add an HTML tag, HTML file or DNS TXT record.
HTML tag
A line of code you paste into the <head> section of your website.
HTML file
An HTML file you download and add into the root directory of your website.
DNS TXT record
You add a verification record to your website’s DNS records.
I used to consider that HTML TAG was the easiest route to claim a website, now I believe DNS TXT RECORD is the best option.
Start with Pinterest
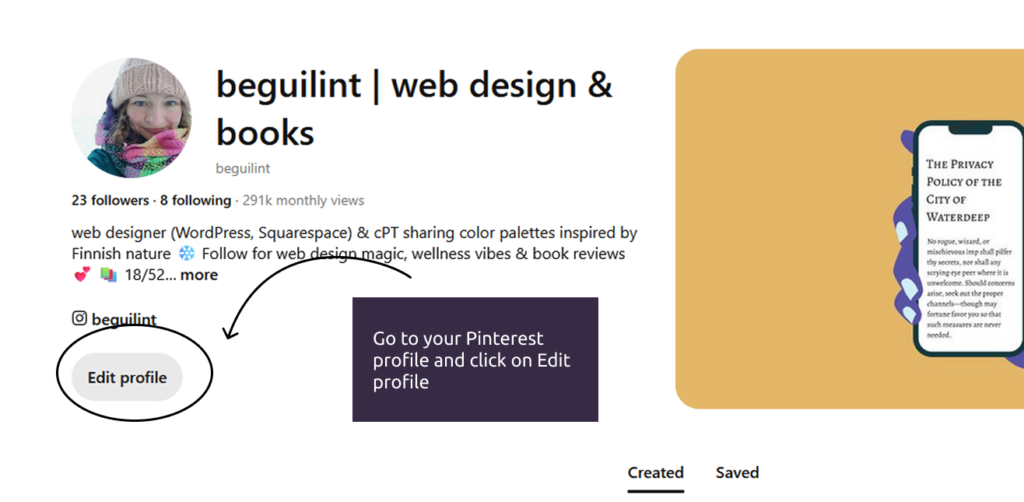
To access the TXT value and HTML tag, start by going to your Pinterest profile and pressing Edit profile
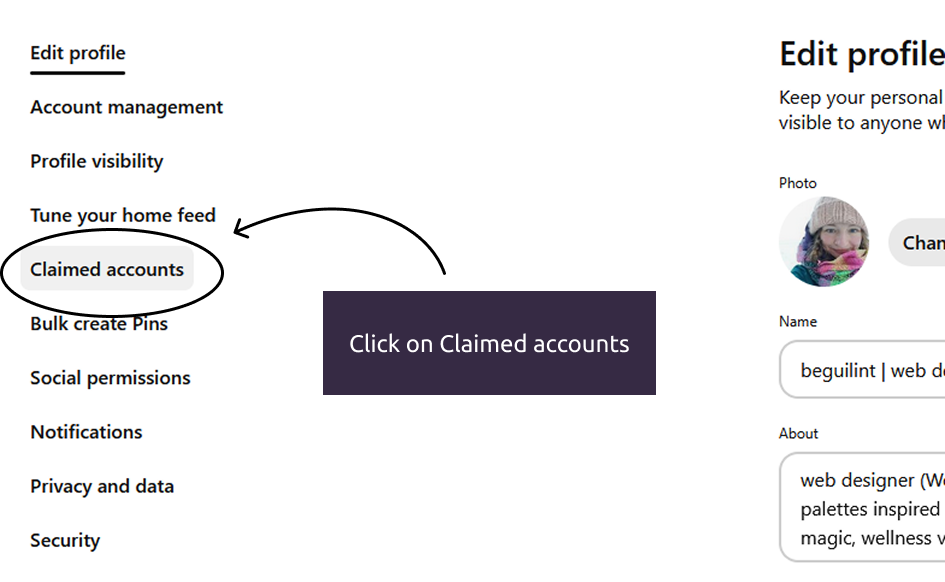
Next, click on Claimed accounts
Navigate to Websites and click Claim
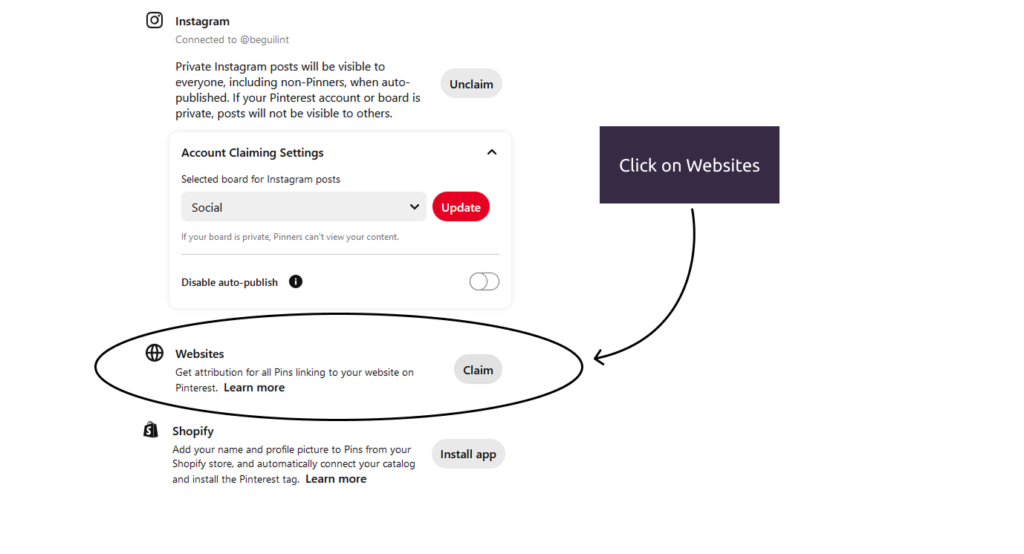
The resulting window will give you all three options of claiming your website.
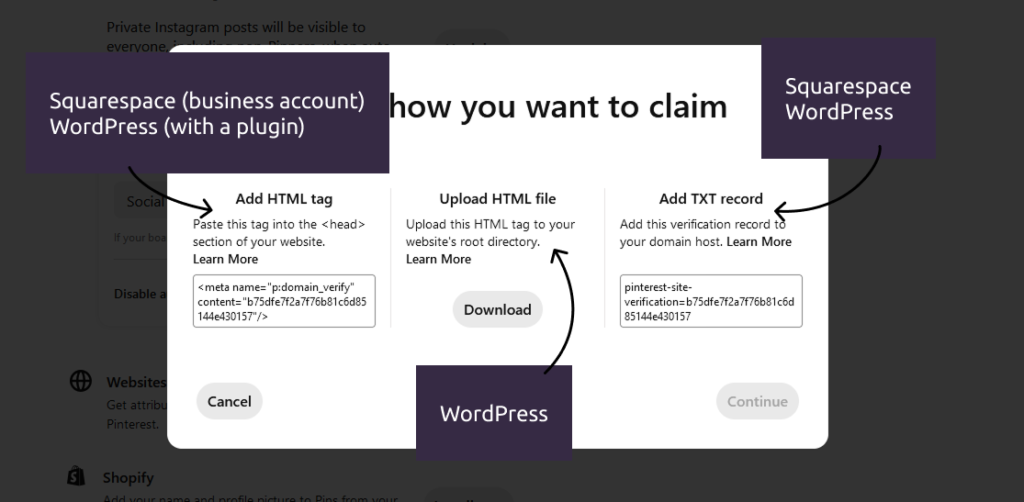
In this post, I won’t be covering how to add an HTML tag to a block theme using a plugin because, in my opinion, installing a plugin just for a Pinterest tag isn’t worth it.
Claim a website with Squarespace
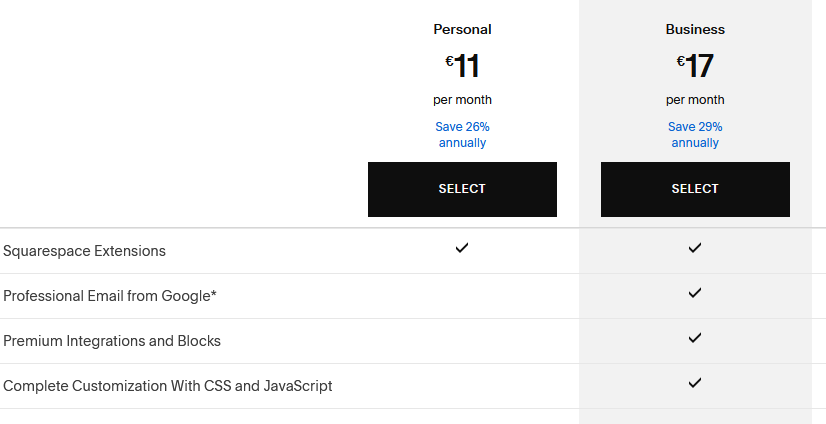
Squarespace has a couple of plan options. In my opinion, it’s one of the downsides of using Squarespace. If you’re starting a blog, you likely don’t need the extra perks of a more expensive plan. The problem with Squarespace’s cheapest and most affordable plan is that you can’t use the HTML tag option to claim your website. This limitation affects other areas as well; you simply can’t inject a code into the header or footer of the website. Frankly speaking, or in this case, writing, that bothers me a lot.
But I digress.
Claiming a website on a Squarespace business plan
Follow these steps to claim your website.
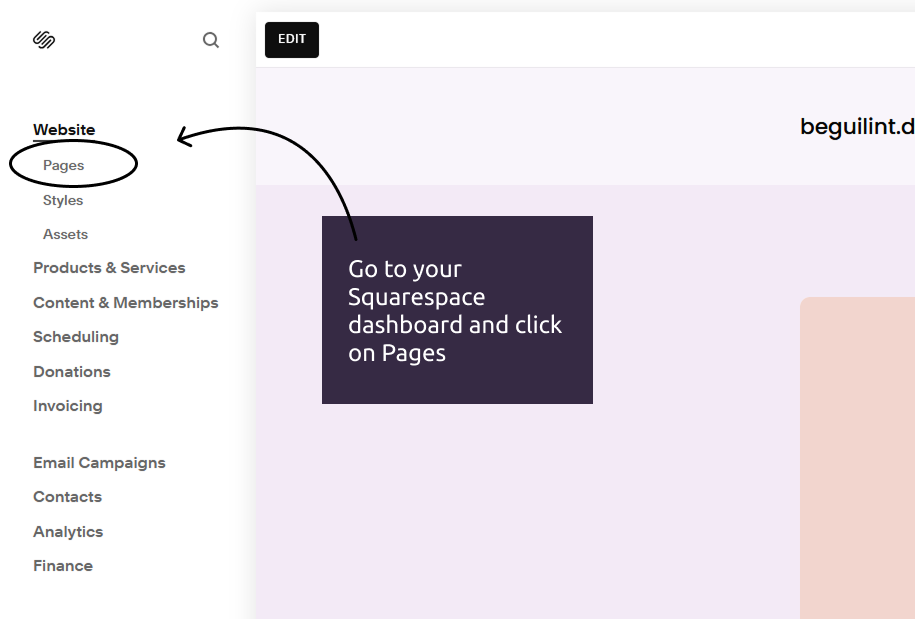
In your website’s dashboard click on Pages
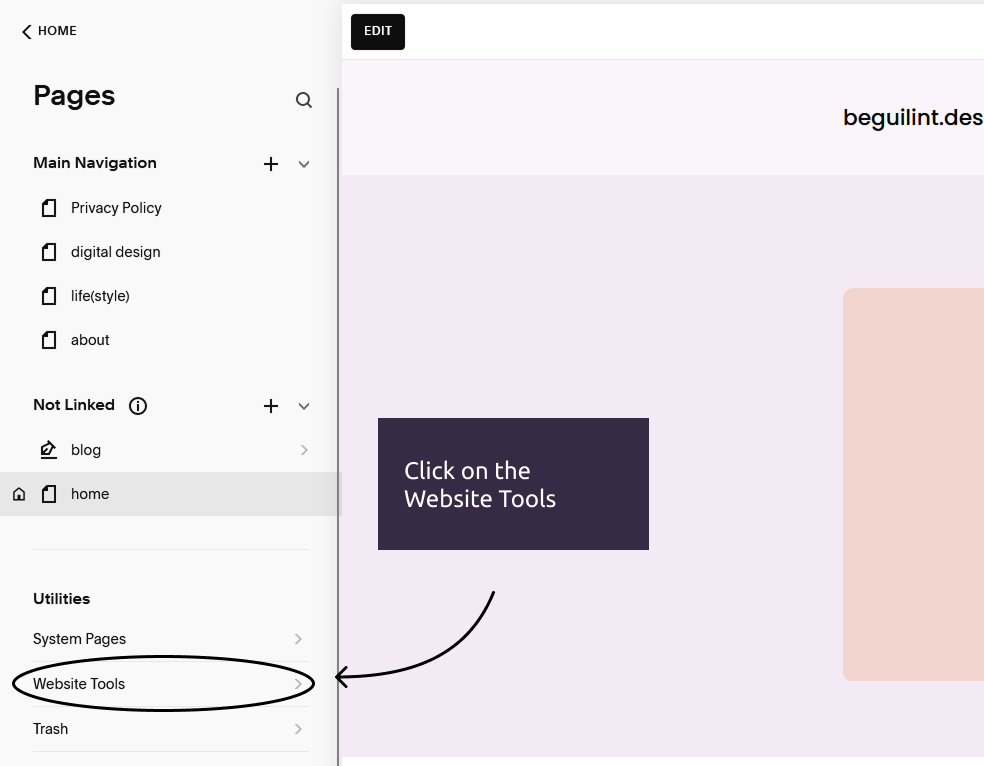
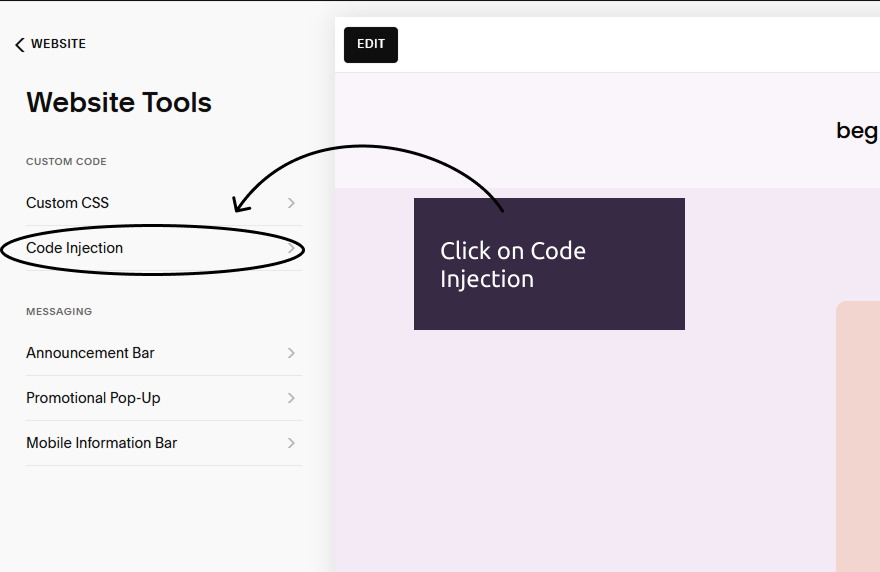
Next, click on Website Tools
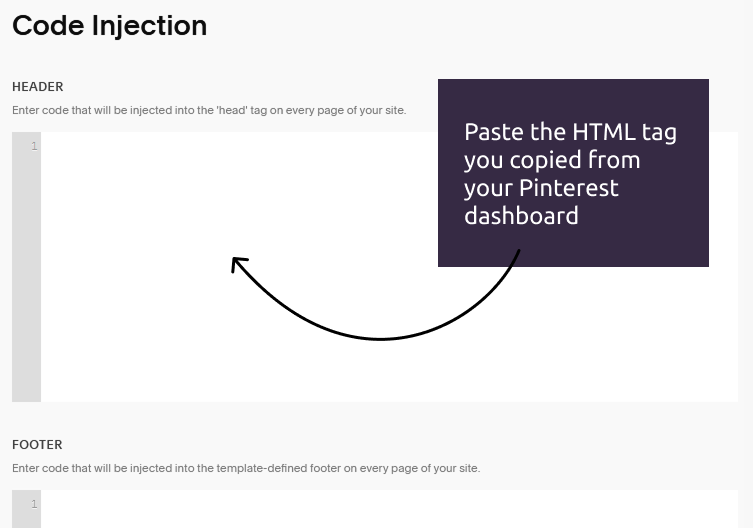
Next, click on Code Injection
Paste the HTML tag you copied from your Pinterest account.
Claiming a website on a Squarespace personal plan or business plan
Remember, if you purchased your domain from a provider other than Squarespace, make sure it’s properly connected to your Squarespace site. Now let’s use the DNS TXT Record path in order to claim your website.
Go to your Squarespace Dashboard and click Domains
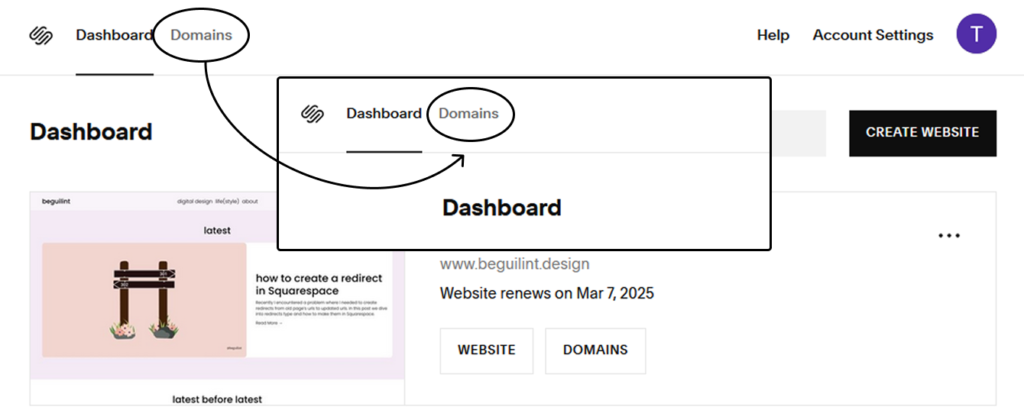
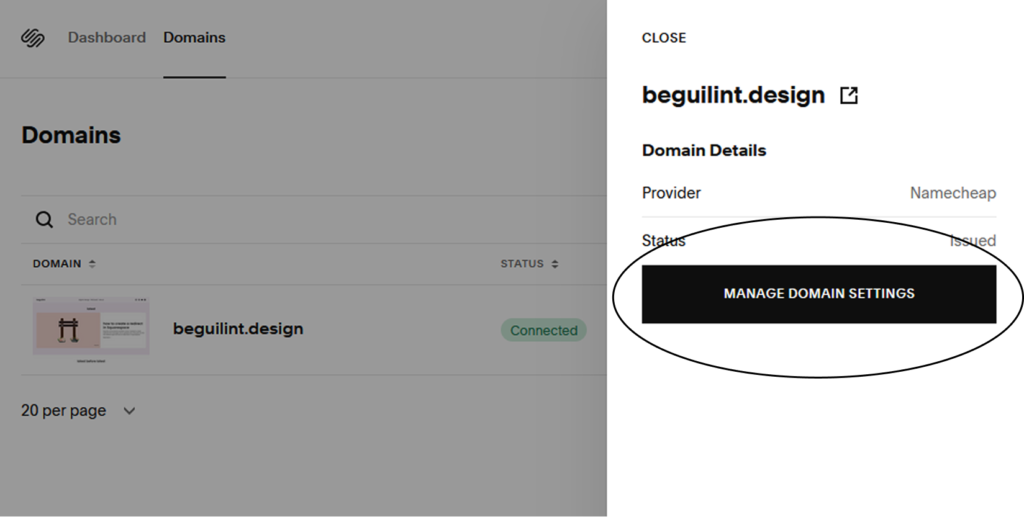
Next, click on the domain you are interested in

Next, click on Manage Domain Settings
Next, click on DNS Settings
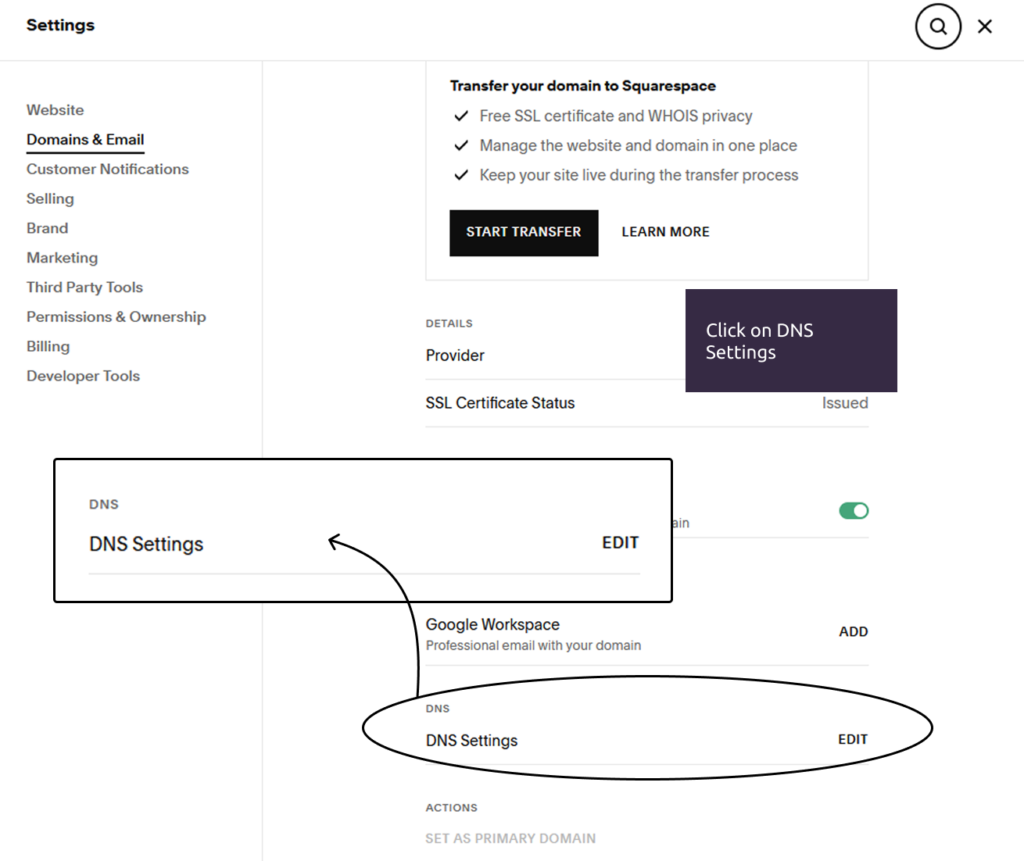
Click on Add Record

Change the record type to TXT, add your TXT value into the input field, and press Save

Claim a website with WordPress
I used to think that the best way to claim your website on Pinterest with WordPress was through HTML TAG. But that’s not the case anymore. The good thing about having a WordPress site is that you can use all three options to claim it.
Claiming a WordPress website using DNS TXT RECORD
The steps to find and edit your DNS settings may vary depending on where your WordPress site is hosted. I’ll walk you through adding a TXT record using Hostinger as an example since it’s the provider I personally use for my website.
Go to your web hosting dashboard, click on Domains and then Domain portfolio
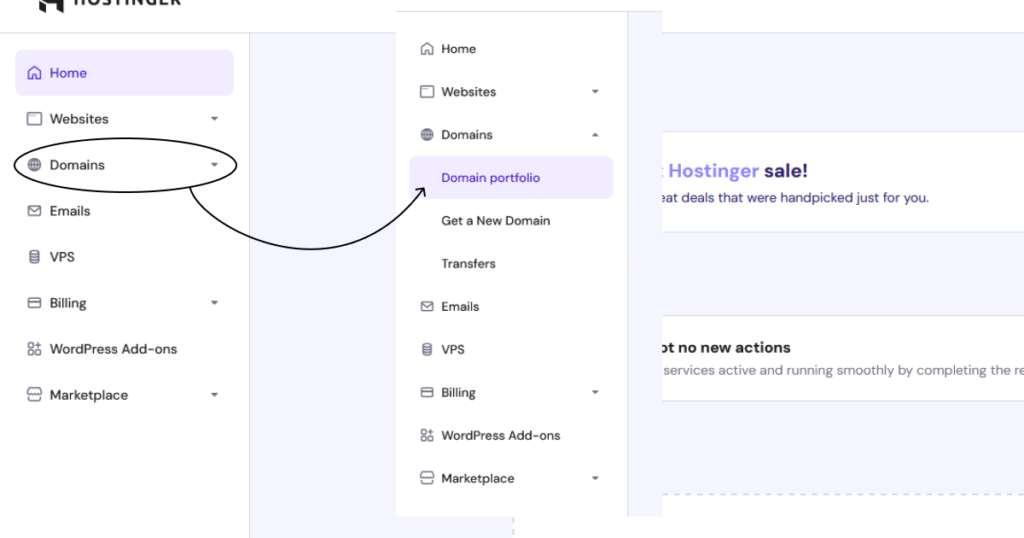
Find the domain you are interested in and click Edit DNS

Change the record type to TXT
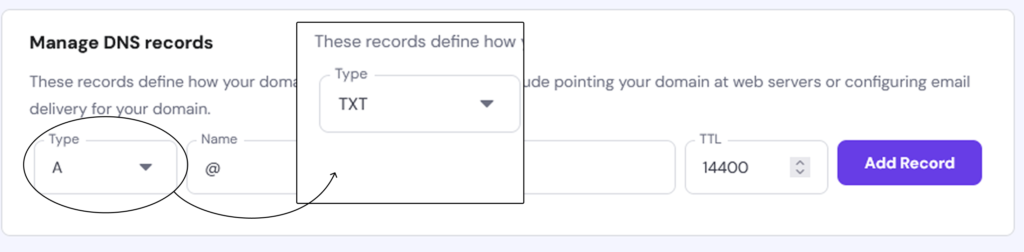
Add your TXT value and click Add Record

Claiming a WordPress website using HTML FILE
There are a few ways to access the root directory of a WordPress site, which is typically named public_html. This is where you’ll want to upload the HTML file you downloaded from your Pinterest account.

If you are using Hostinger, you can access File Manager through the following steps.
In your Hostinger dashboard go to Websites and then click on Websites list
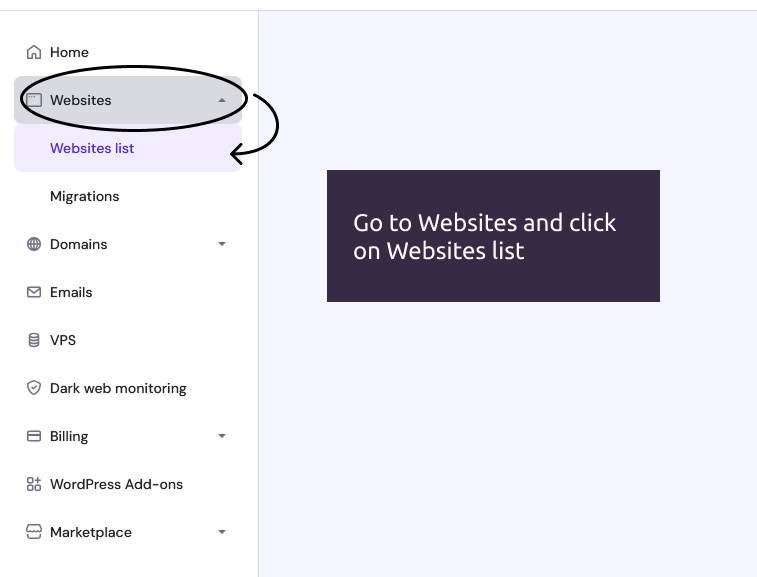
Next, click on Files and access File Manager.
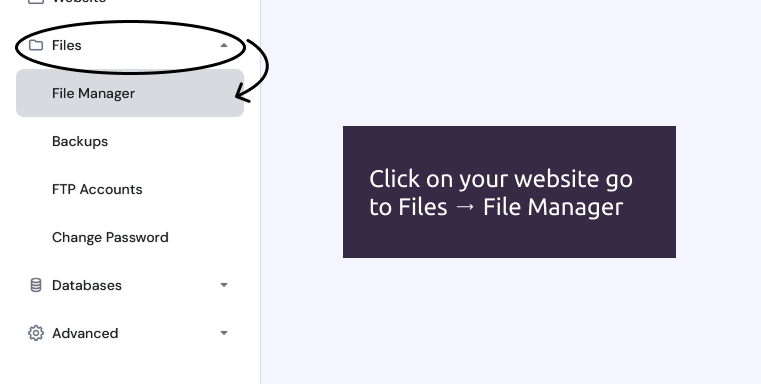
Next, upload your HTML file to the root directory.
Verifying installation
To verify your installation go back to your Pinterest account and press Continue
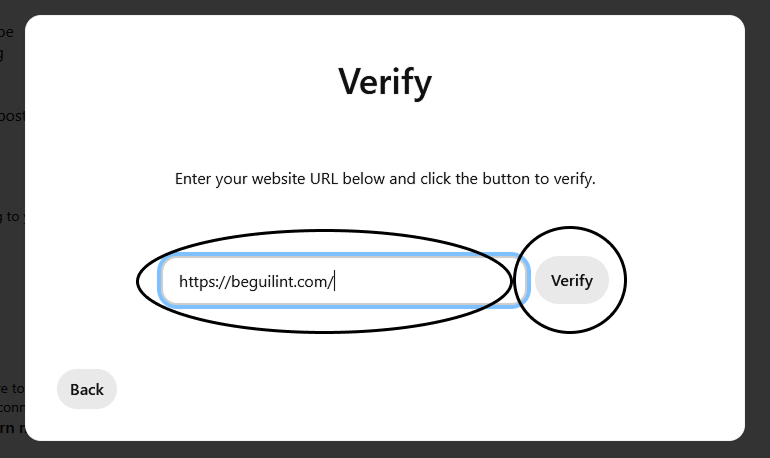
Input your website URL and click on Verify
On a success you will see this screen =)
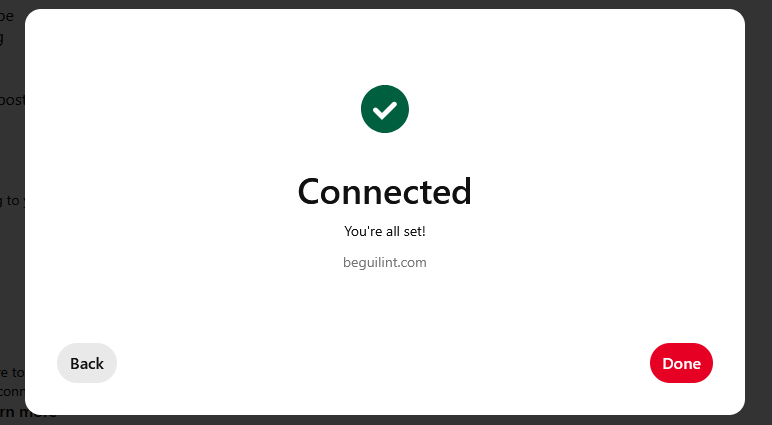
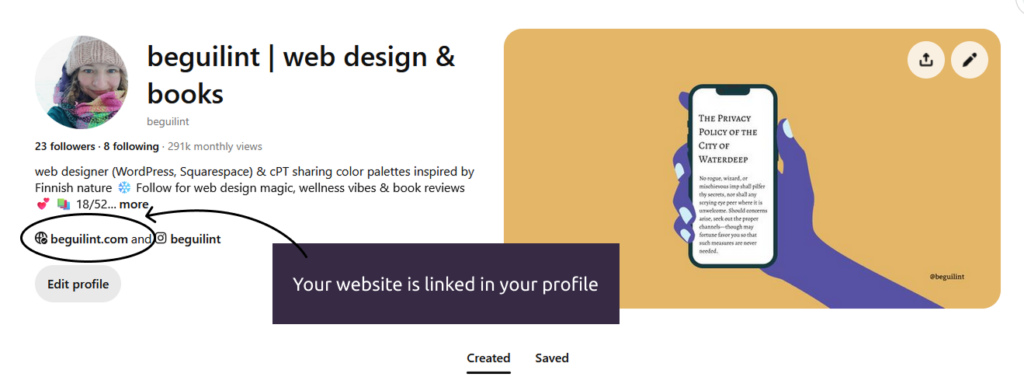
Your website will be automatically shown in your profile
I hope this post helped you in your quest!